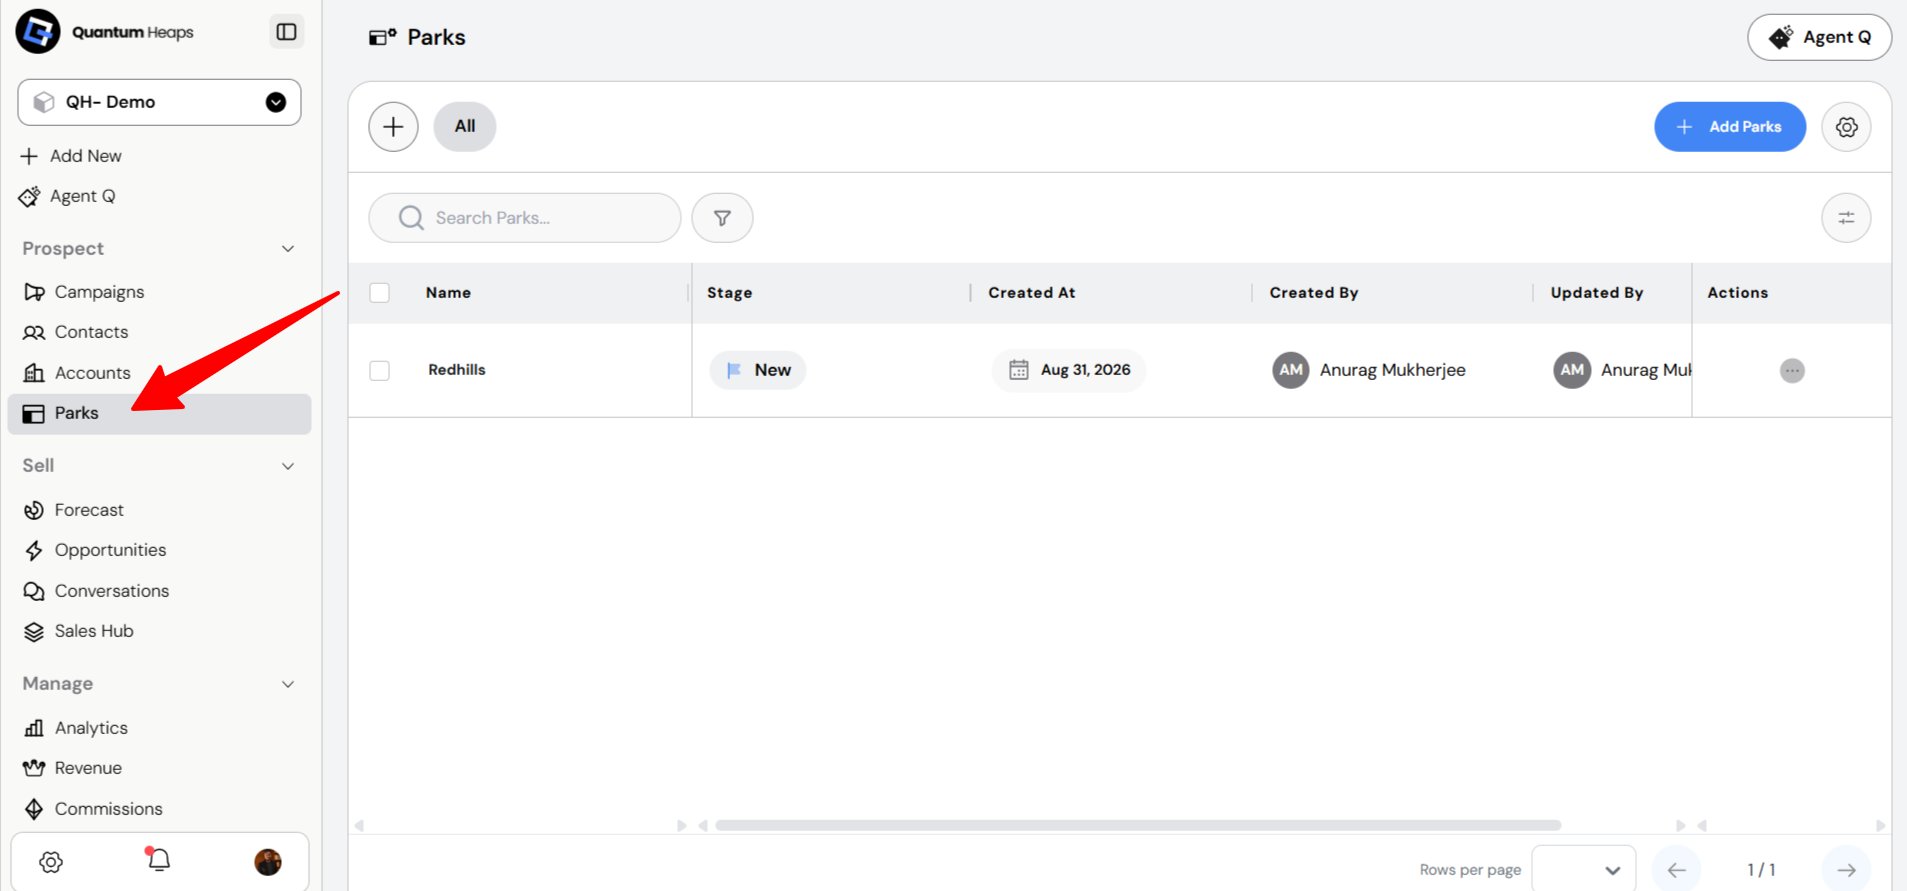
- Build an Ideal Customer Profile (ICP) list to target the right prospects
- Create contacts, accounts, and opportunities without opening their individual modules
- Pull forecast and pipeline data on demand, in plain language
- Get answers about deals, accounts, and meetings without running a manual report
- Draft emails and prep for meetings directly from the assistant
Building an ICP with Agent Q
Instead of setting filters one by one, you can describe your ideal customer to Agent Q directly under its Prospect category:- “Find me VP-level marketing contacts at companies with 50–200 employees in the US.”
- “Show me accounts using [specific technology] with revenue over $10M.”
- “Build a list of prospects similar to my top closed-won accounts this quarter.”
Where to Find It
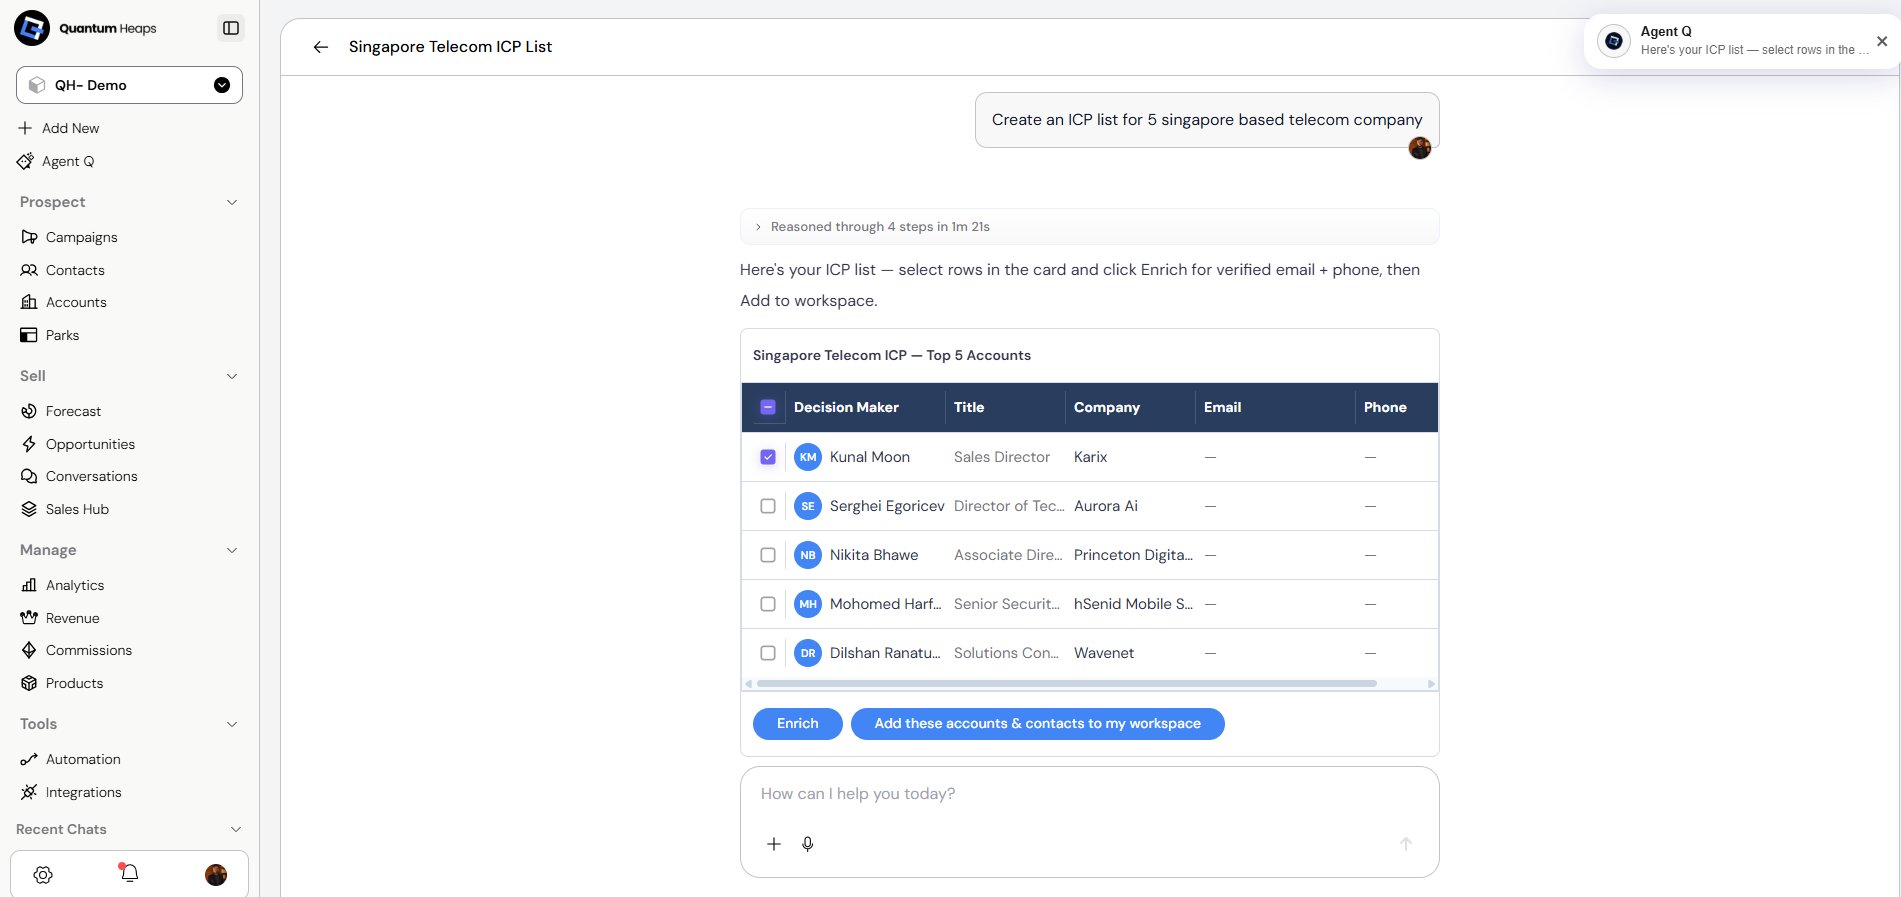
Click Agent Q in the left sidebar. It’s also accessible as a constant button throughout other modules, so you’re never more than a click away from it.My Desk
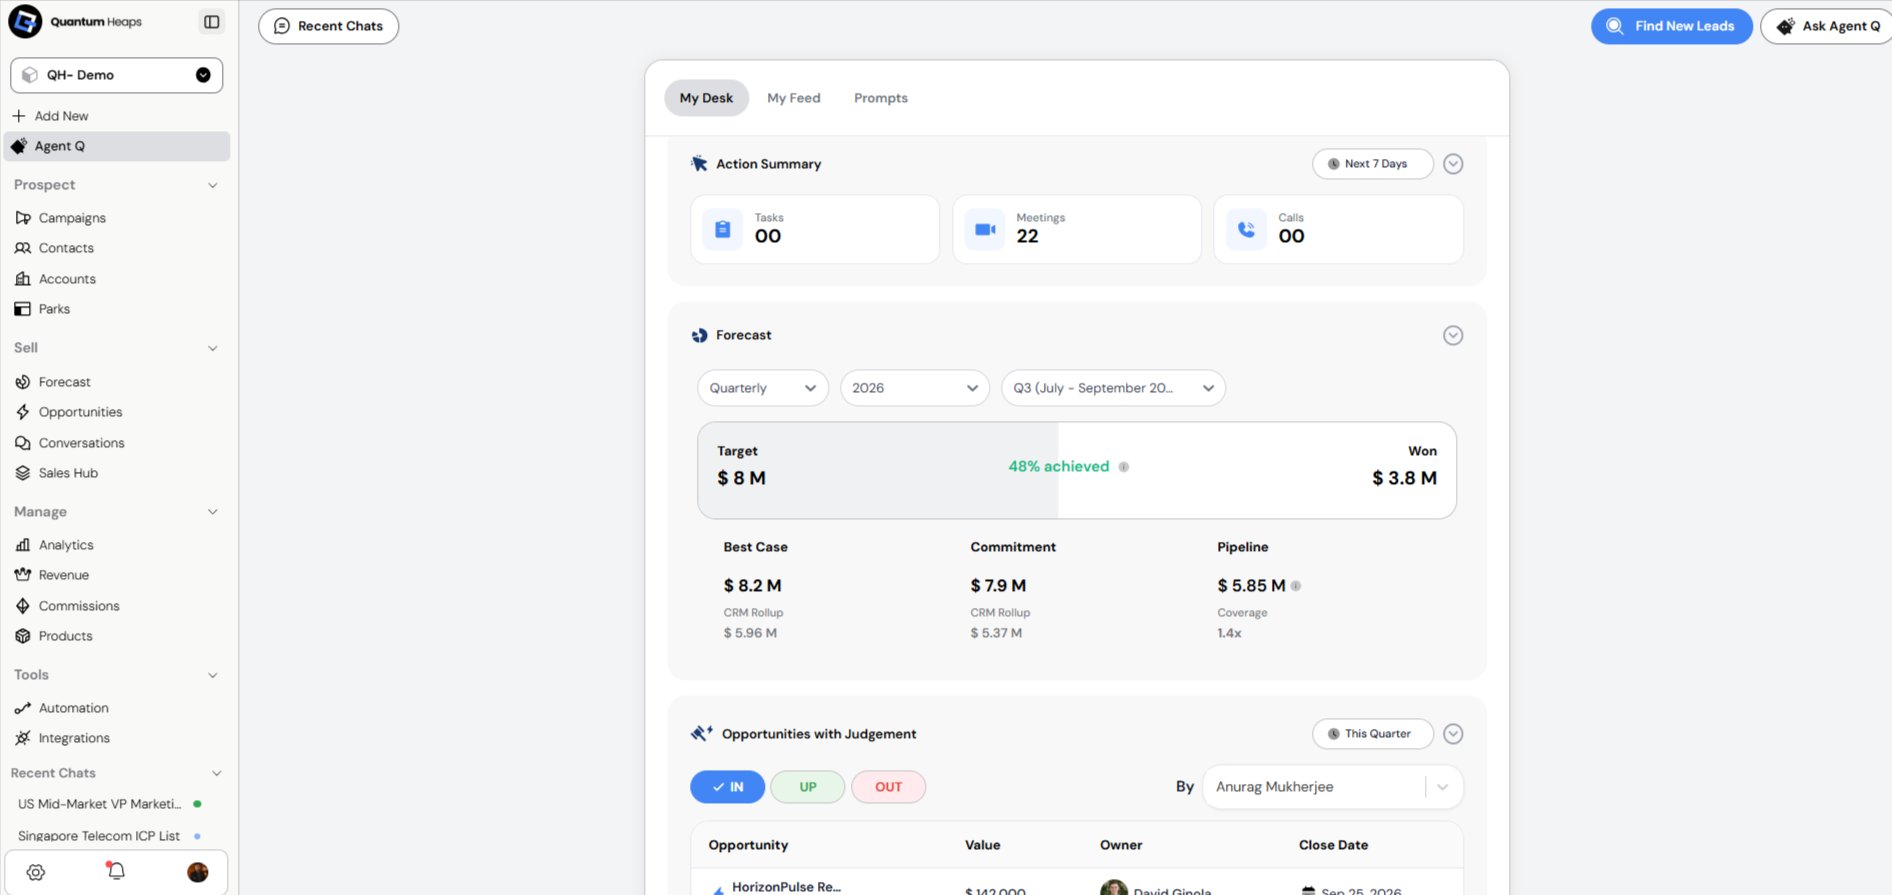
Understanding My Desk in the Quantum Heaps:Overview: My Desk is your personal home dashboard the first screen you see each day, showing your Pipeline, Activity, Action Summary, Forecast, Risk and Health AI Insights, Top Open Opportunities, Accounts/Contacts with Most Activities, and Newly Added.
- Check your forecast, top deals, and most active accounts and contacts in one view
- Ask Agent Q a question or give it a task without leaving your home screen
- Track your upcoming tasks, meetings, and calls for the week
- Spot at-risk or low-health opportunities before they become a problem
- Manage your tasks, conversations, and notes without switching modules
Action Summary : Counts of Tasks, Meetings, and Calls for the Next 7 Days; click any count to jump to its filtered list
Tasks
Tasks(your personal tasks) and Close Plan(tasks tied to opportunity close plans). Tasks are grouped under due-date headers, each card showing a priority badge, task name, type icon, assignee, and due date.- Click + Add to create a task: write it in the rich text editor, set a priority (Low/Medium/High/Urgent), attach a file, and link it to a Team Member, Contact, Account, or Opportunity
- Use the 3-dot menu on any card to edit or delete it, or click the checkmark to mark it complete
Conversations
Shows your logged calls, meetings, and emails grouped by date, with All / Emails / Meetings / Callsfilter tabs, a search bar, and a filter icon with an active-filter count badge. Click Add ▾to log a newCall, In-person Meeting, Virtual Meeting, or Compose Email.Available Widgets in My Desk Panel
Forecast Overview
Shows your quarterly pipeline at a glance —Target, Won, and % achieved at the top, then a breakdown into Best Case, Commitment, and Pipeline, each with a rollup value and coverage ratio. Use the Frequency, Year, and Quarter selectors to change the period, and hover the (ⓘ) icon next to the achieved percentage for more context.
Opportunities with Judgement
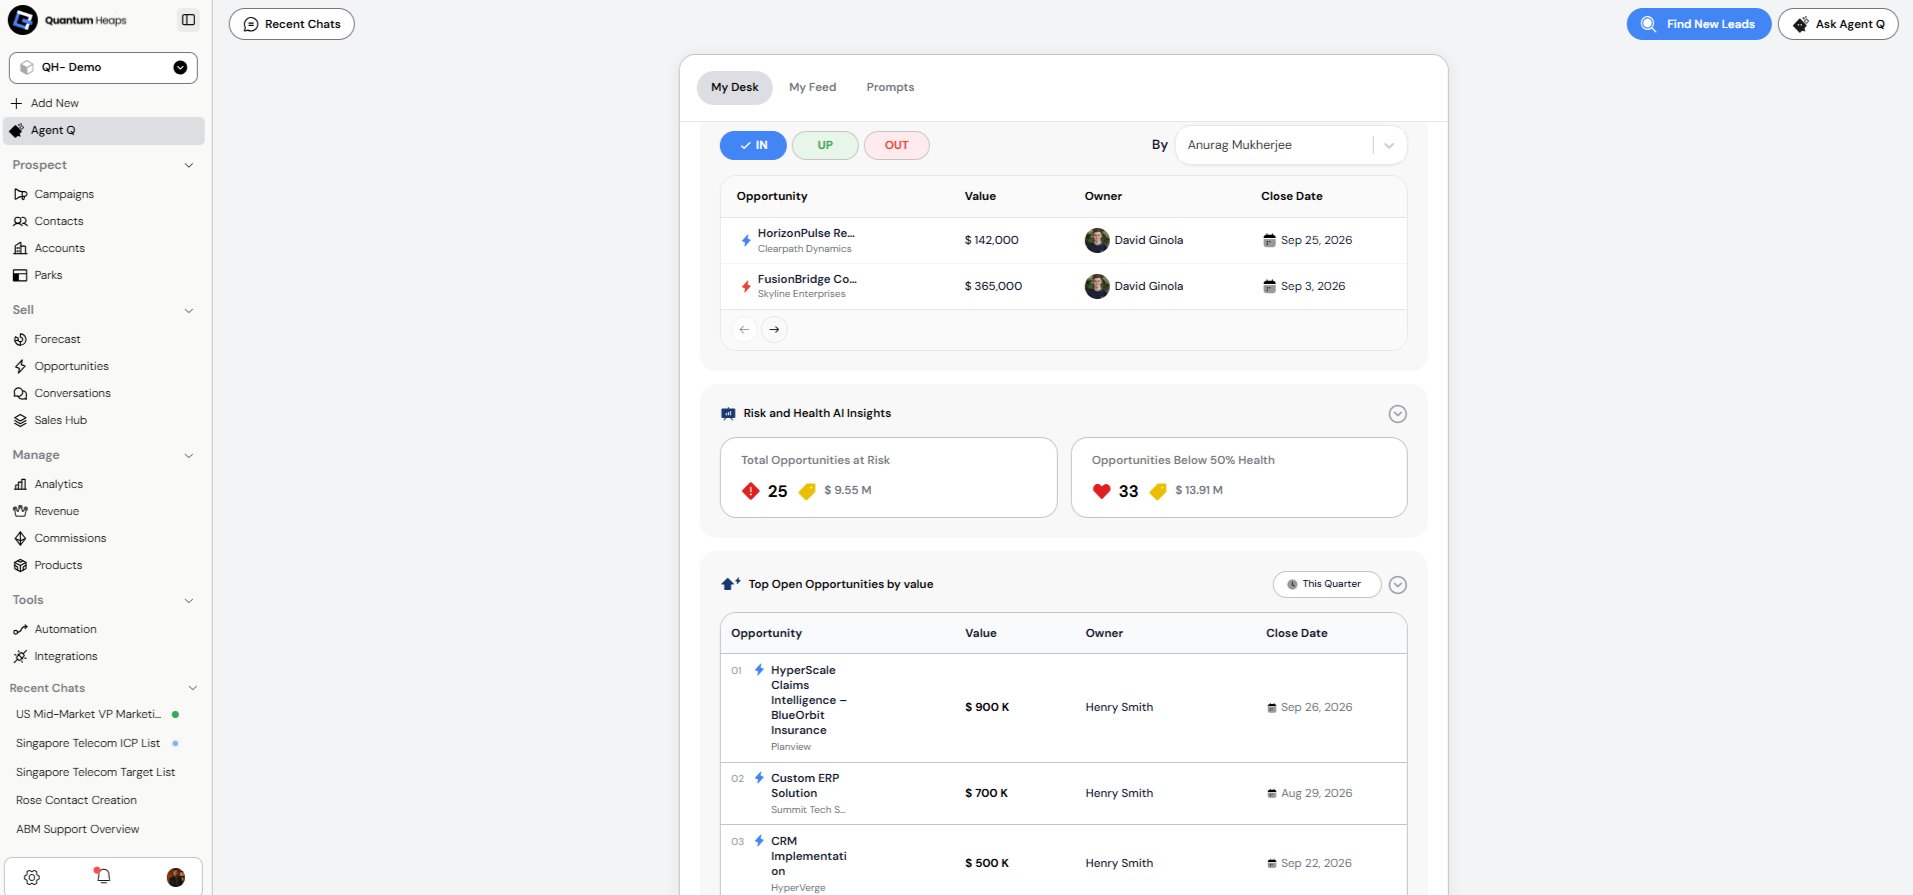
Filter your opportunities by IN (committed), UP(upside), or OUT (at risk) — click a tab to switch categories. Each row shows Opportunity, Value, Owner, and Close Date. Filter further By owner or by quarter, and paginate with the arrows.Top Open Opportunities by Value
Ranks your top 5 open deals by value, showing Rank, Opportunity name (with company), Value, Owner, and Close Date. Filter by quarter, and click any row to jump straight to that opportunity’s detail page.Accounts with Most Activities
Ranks your top 5 accounts by total activity — Email (sent/received), Call (outgoing/incoming), and Meetings, each broken out separately. Filter by quarter.Top Ongoing Accounts by Value
Ranks your top 5 accounts by their open opportunity value, showing Rank, Account Name, Opportunity Value, Owner, and Last Activity date. Unassigned accounts show as “Unassigned.” Filter by quarter and paginate through results.Contacts with Most Activities
Same structure as Accounts with Most Activities, but ranking your top 5 contacts instead — Email, Call, and Meeting counts, filterable by quarter.Newly Added
Counts of Opportunities, Contacts, and Accounts added in the Last 7 Days, each clickable.Creating Custom Modules
Custom Modules let you extend Quantum Heaps beyond the 12 core CRM modules to track anything specific to your business, assets, projects, service requests, or any other object your team needs a pipeline and record type for.Where to Find It
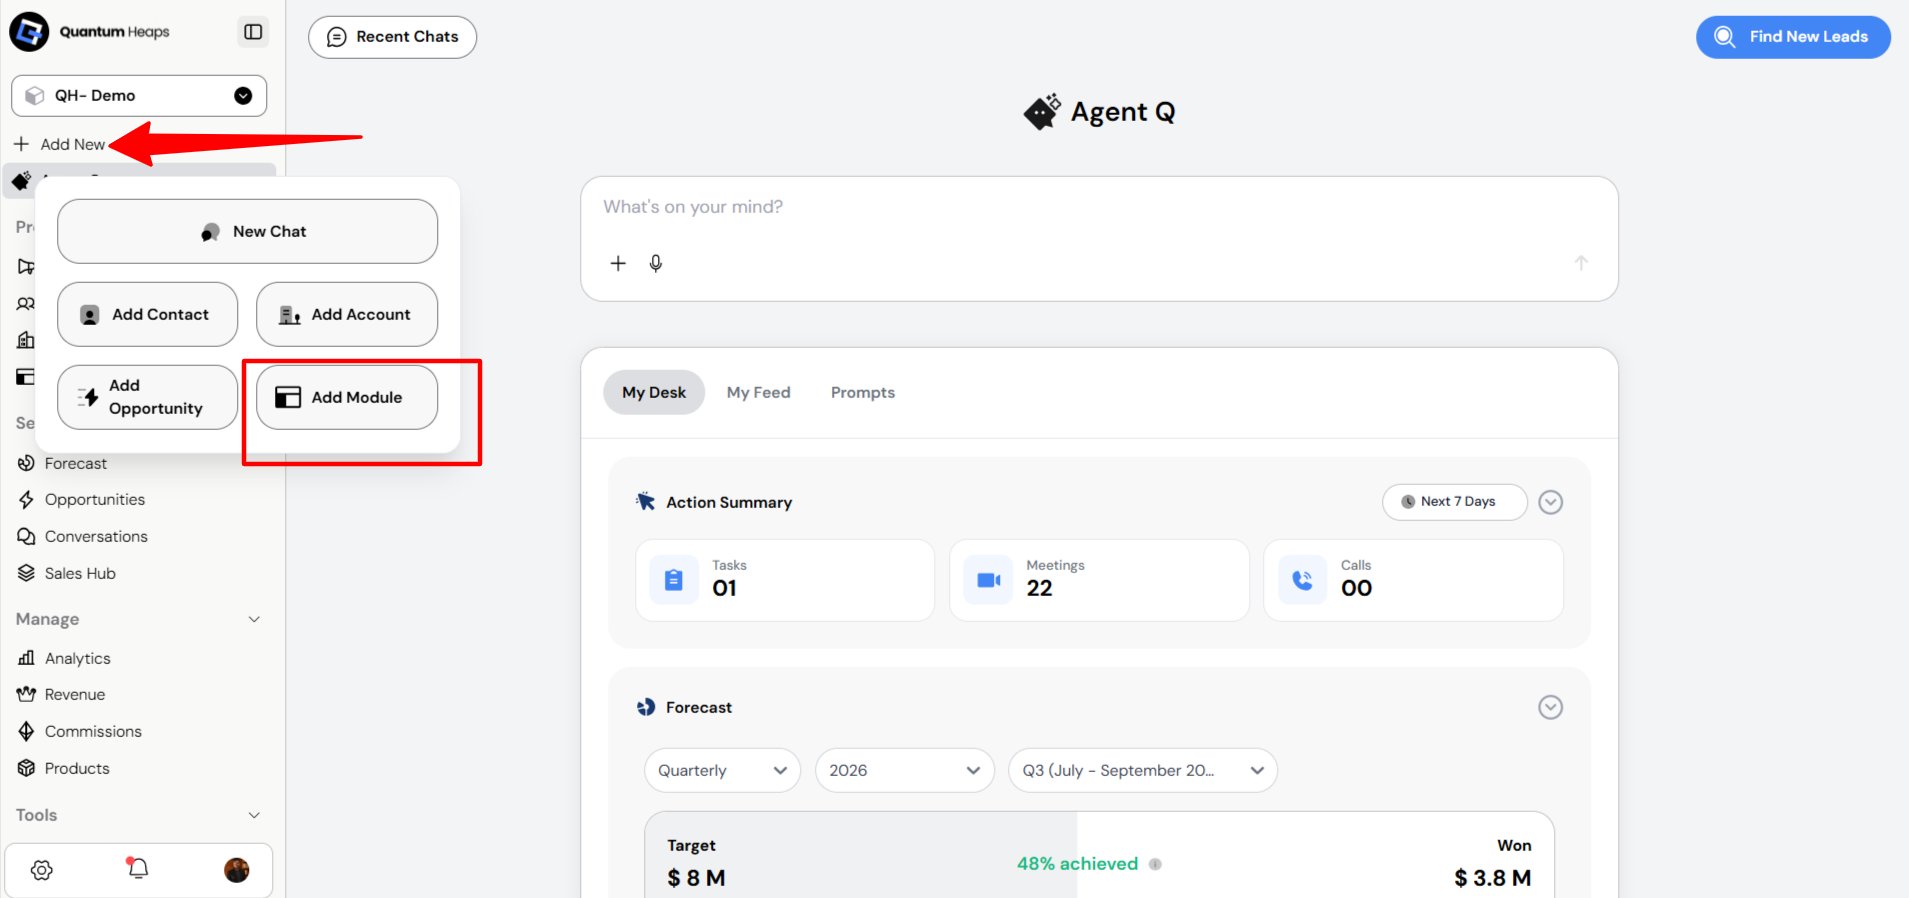
From any screen in the CRM:- Click Add New in the left sidebar.
- Select Add Module from the menu.
What You’ll Configure
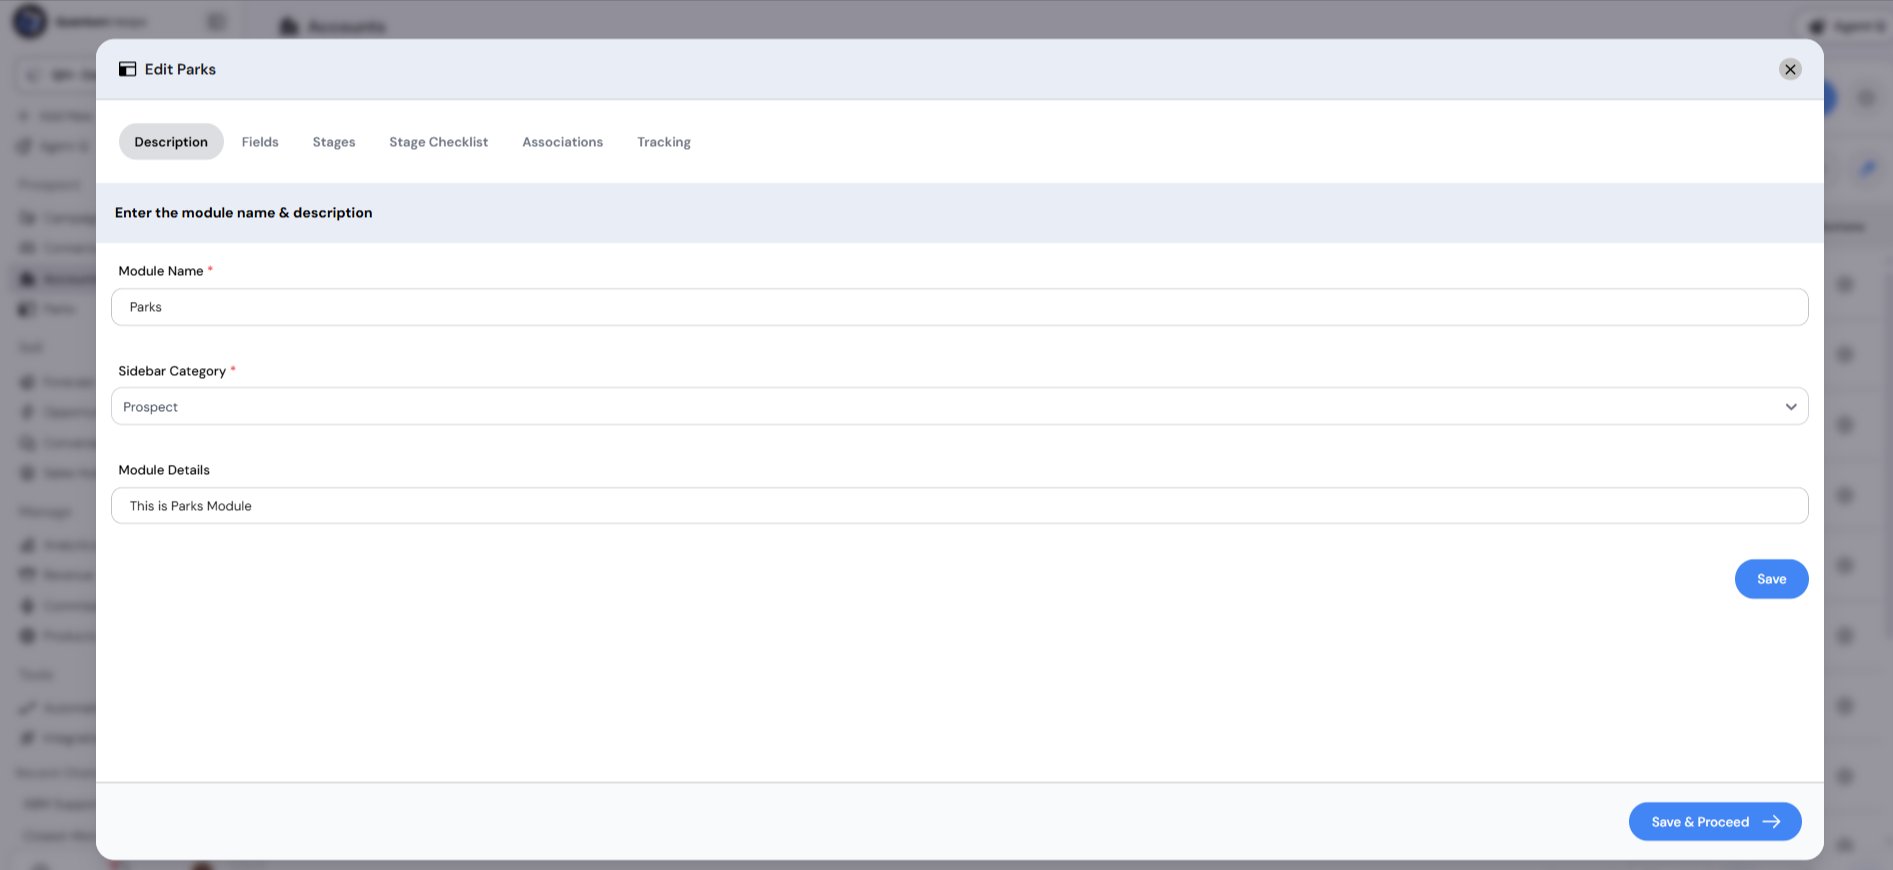
Building a custom module walks you through six steps, each its own tab in the setup panel:- Description — module name, sidebar placement, and a short description
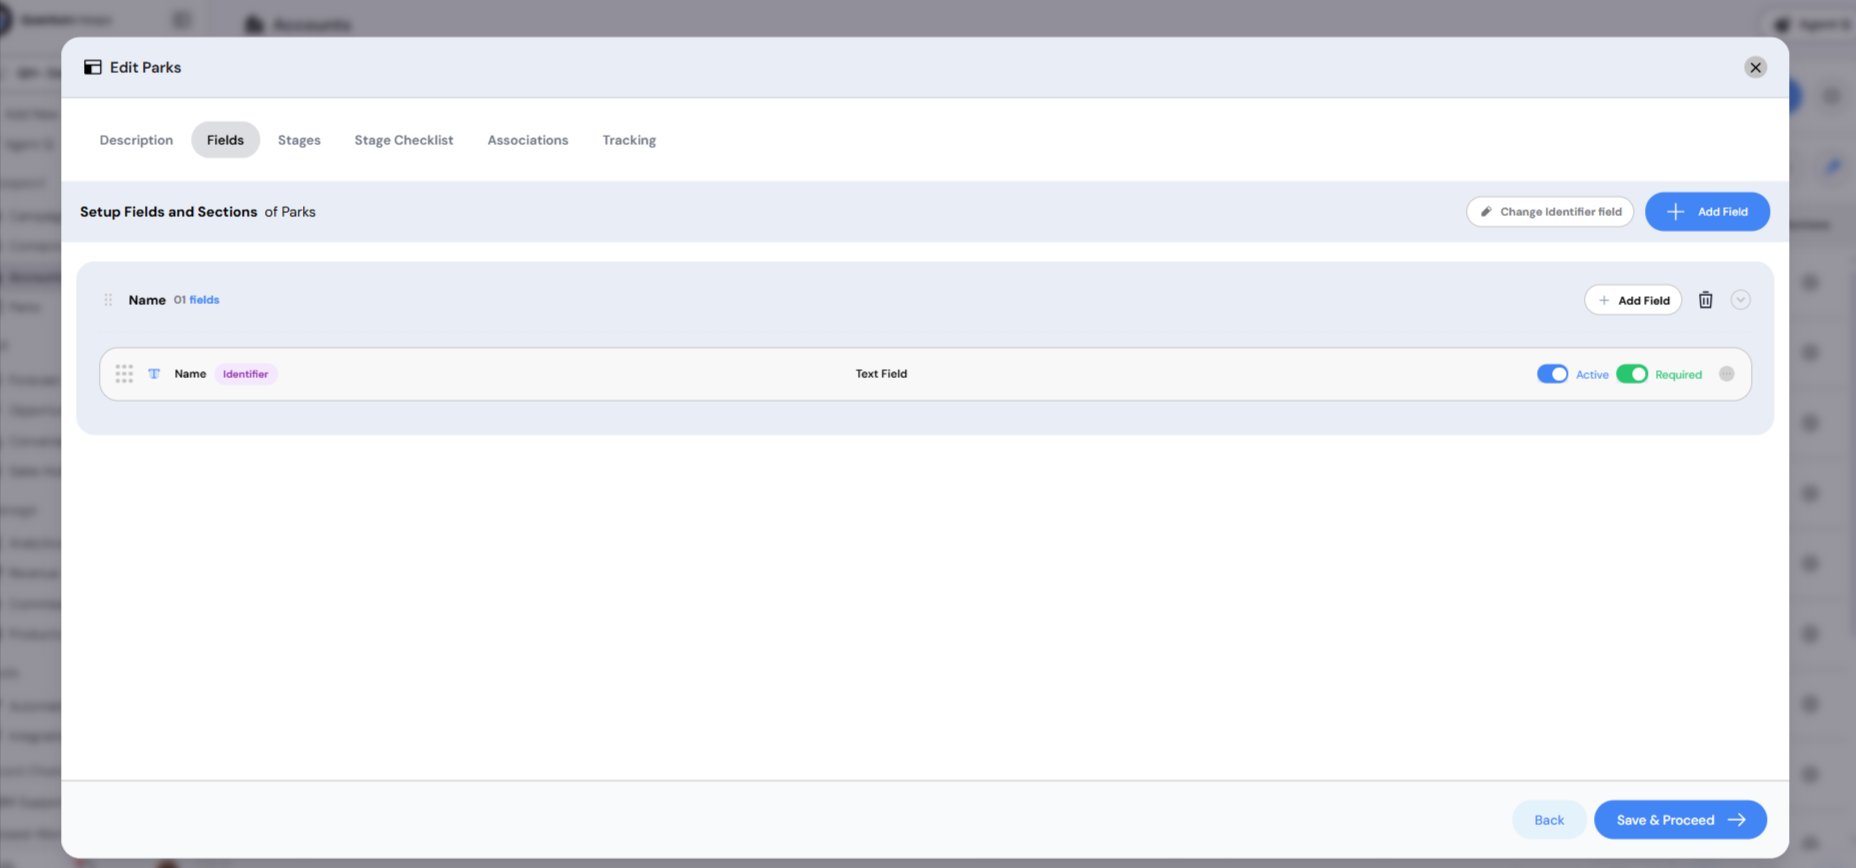
- Fields — the data fields records in this module will capture
- Stages — the stage format and pipeline(s) records move through
- Stage Checklist — tasks or requirements tied to each stage
- Associations — which other entities (Contacts, Accounts, etc.) this module can link to
- Tracking — whether Tasks, Notes, and Conversations are enabled on records
Step-by-Step: Build a Custom Module
Step 1 — Name and Describe the Module
On the Description tab:- Enter a Module Name (required) — this is the label used throughout the CRM, e.g. “Parks.”
- Choose a Sidebar Category (required) — this determines which section of the left sidebar the module appears under, e.g. Prospect.
- Add Module Details (optional) — a short description of what the module is for.
- Click Save & Proceed.
Step 2 — Add Fields
On the Fields tab, new modules start empty — you’ll see “No fields configured yet.”- Click Add Field to build out the data fields records in this module will capture.
- Click Set Identifier Field to choose which field represents each record by name across the CRM (for example, in lists and lookups on other modules).
- Click Save & Proceed once your fields are set up.
Step 3 — Choose a Stage Format
On the Stages tab, you’re first asked to pick how stages are organized for this module: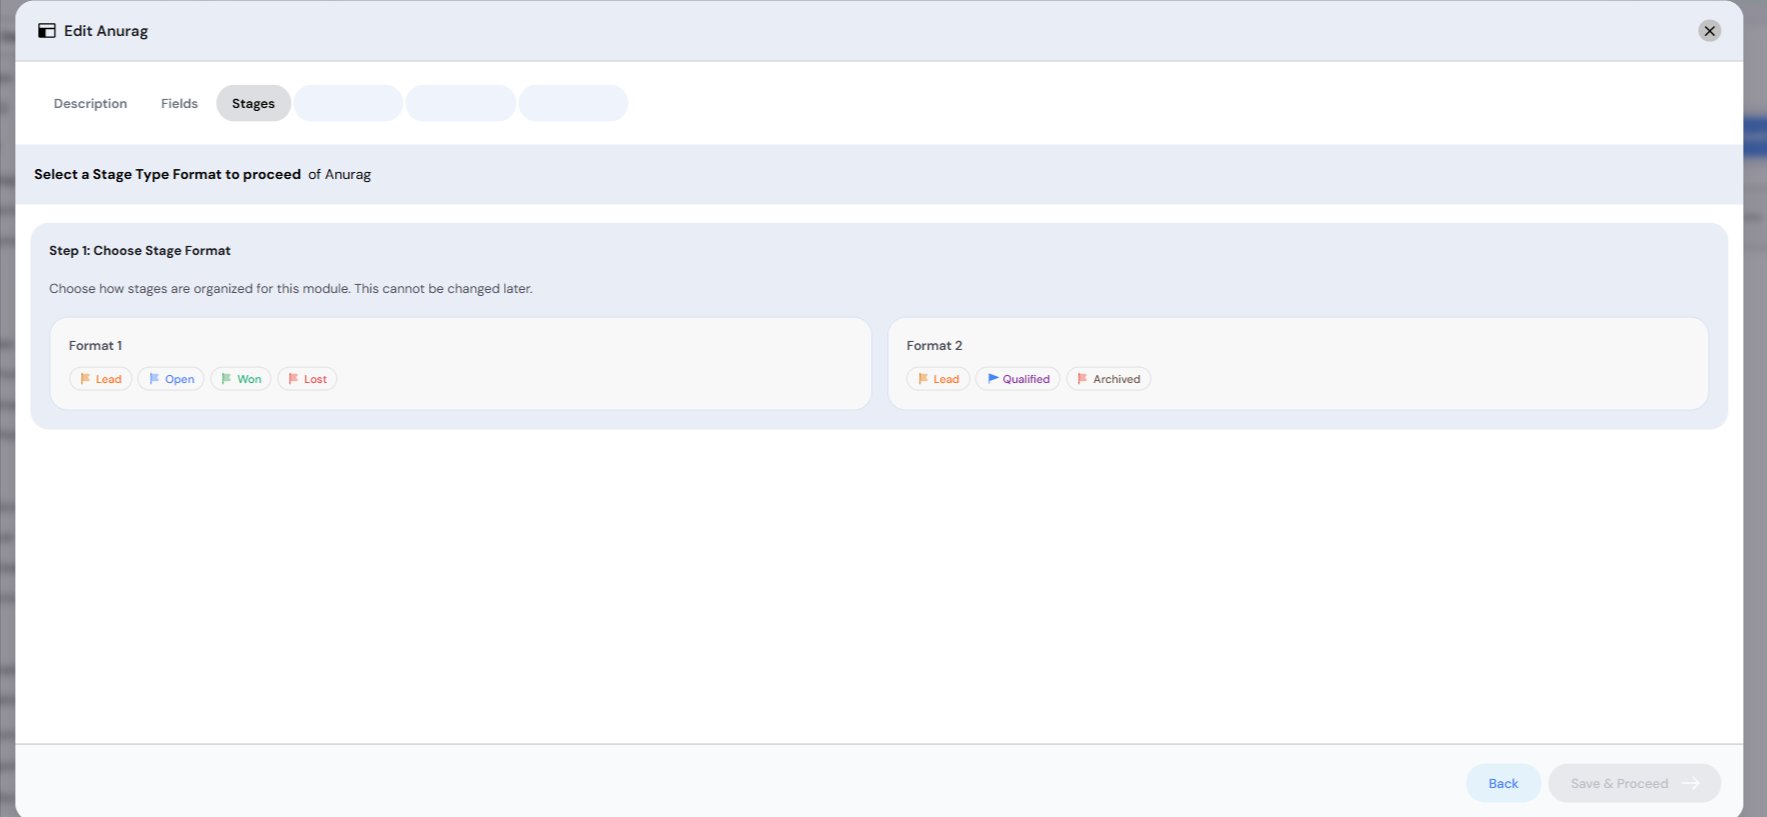
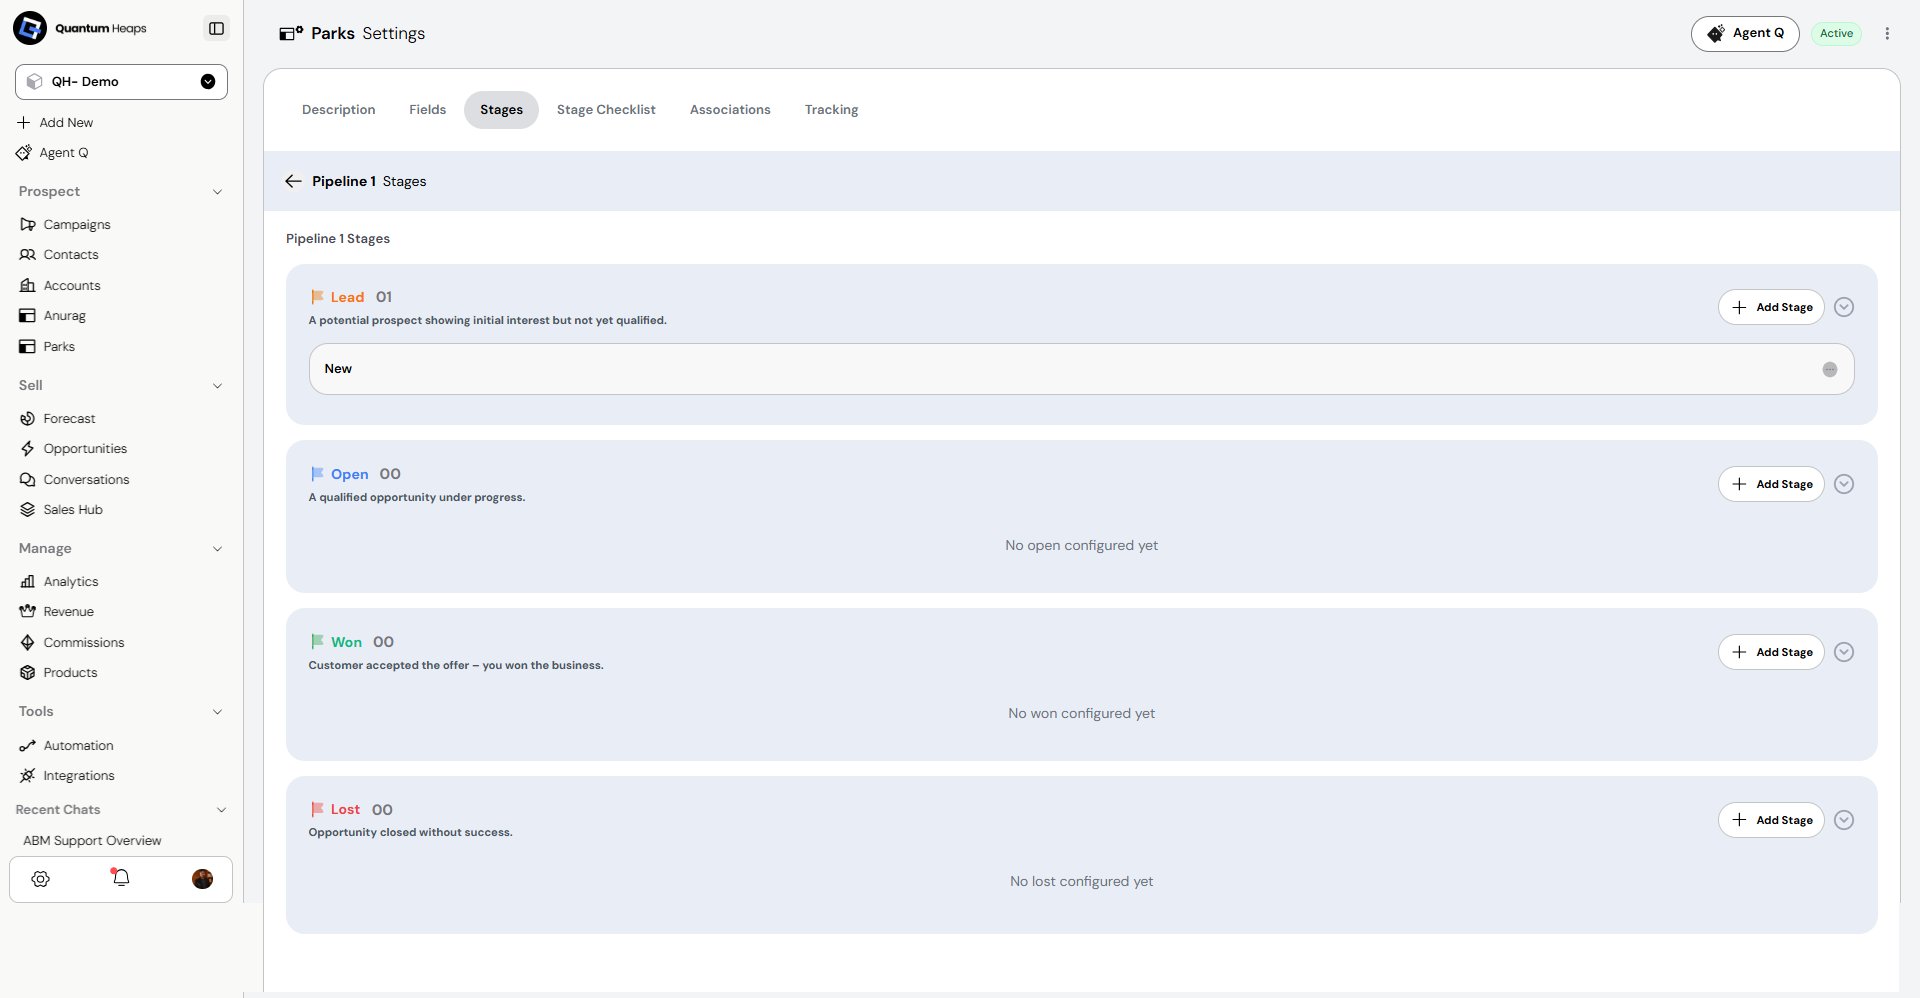
Step 4 — Build the Pipeline
After the format is set, you’ll land on Manage Pipeline:- Click Add Pipeline to create a pipeline for the module. A module can hold more than one pipeline if you need different tracks for different record types.
- Select a pipeline from the list to add and order the individual stages within it (a new pipeline starts with 0 Stages).
- Click Save & Proceed.
Step 5 — Add Stage Checklists
On the Stage Checklist tab:- Select the Pipeline you want to configure from the dropdown.
- For each stage listed, click Add Checklist to define the tasks or requirements that should be completed before a record moves out of that stage. Stages start with no checklists configured.
- Click Save & Proceed.
Step 6 — Configure Associations
On the Associations tab, choose which other entities this module’s records can link to: Contacts, Accounts, Opportunities, Team Members, and Territories. Each entity has three toggles: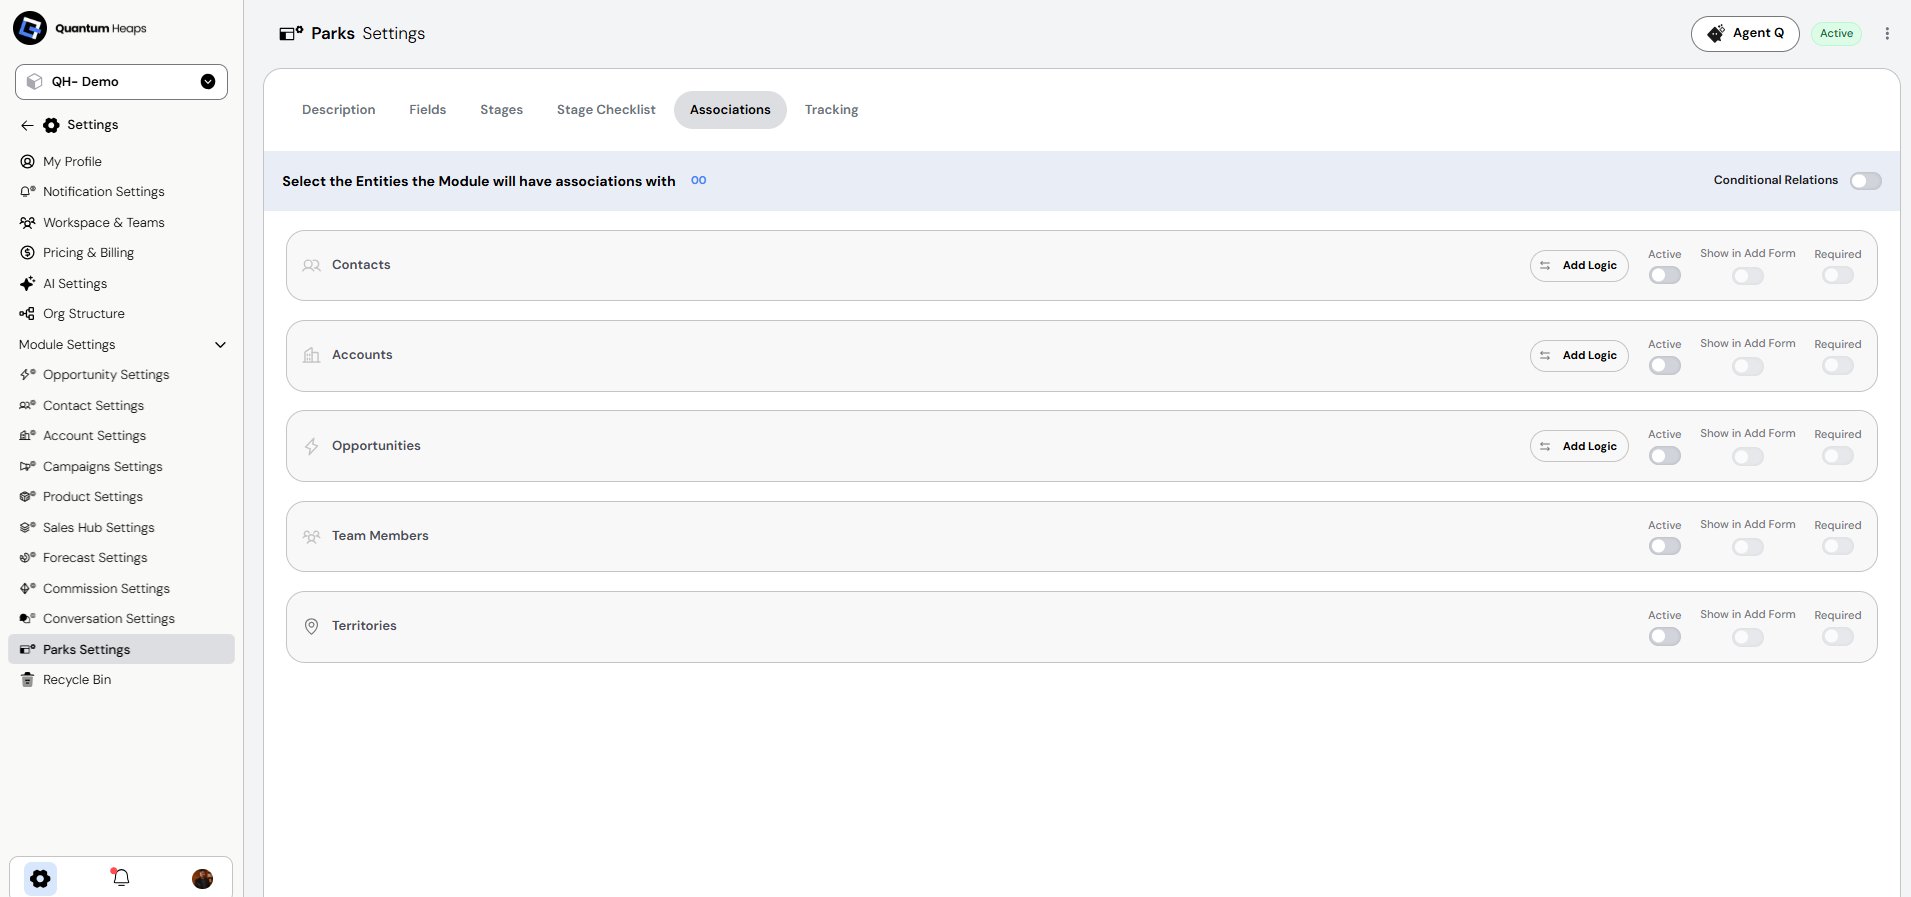
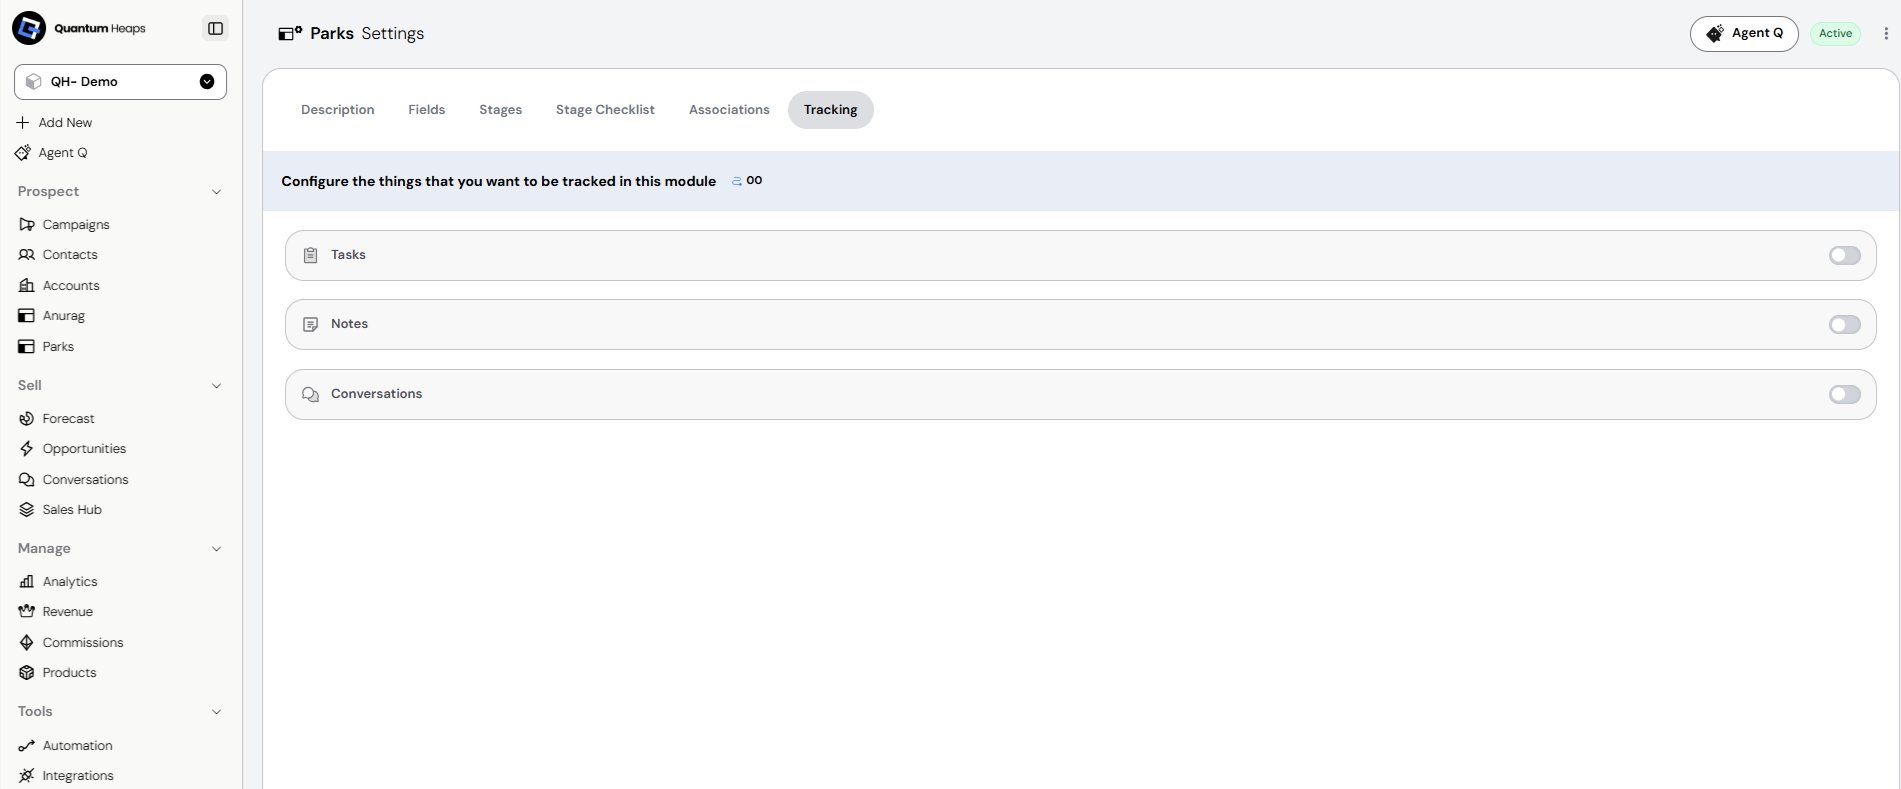
Step 7 — Set Up Tracking
On the Tracking tab, toggle on any of the following you want enabled for records in this module:- Tasks
- Notes
- Conversations
Step 8 — Save & Complete
Click Save & Complete to finish. The module is now live and will appear in the sidebar under the category you chose, and as an option under Add New going forward.