> ## Documentation Index
> Fetch the complete documentation index at: https://docs.quantumheaps.com/llms.txt
> Use this file to discover all available pages before exploring further.
# Onboarding to QH
This guide walks you through the essential steps to get your QuantumHeaps set up and ready to capture activity automatically. You’ll learn how to control when new accounts and contacts are created, connect key apps like Google and Outlook to sync emails and meetings, and adjust other Organizational Settings that define how your CRM operates at the company level.
If you’re not an admin, some settings may not apply to you; however, this article will help you understand how your organization’s account setup works.
###
**What Happens When You Onboard**
* Sign in with Google or your email address
* Set up your profile — name, photo (optional), email address, phone number (optional)
* Verify your email with a one-time passcode
* Join an existing workspace in case your team has set up, or create your own from the ground up.
### **Step 1: Log In**
On the login screen, choose one of two ways to get started:
* **Continue with Google** — sign in instantly using your Google account
* **Email address** — enter your email and click **Continue**
.png?fit=max&auto=format&n=-jQYdYtpsW7ToMeo&q=85&s=266ec61bd060d245a667efc680568c0a) If you're new to Quantum Heaps, click **Create your profile** to begin sign-up instead.
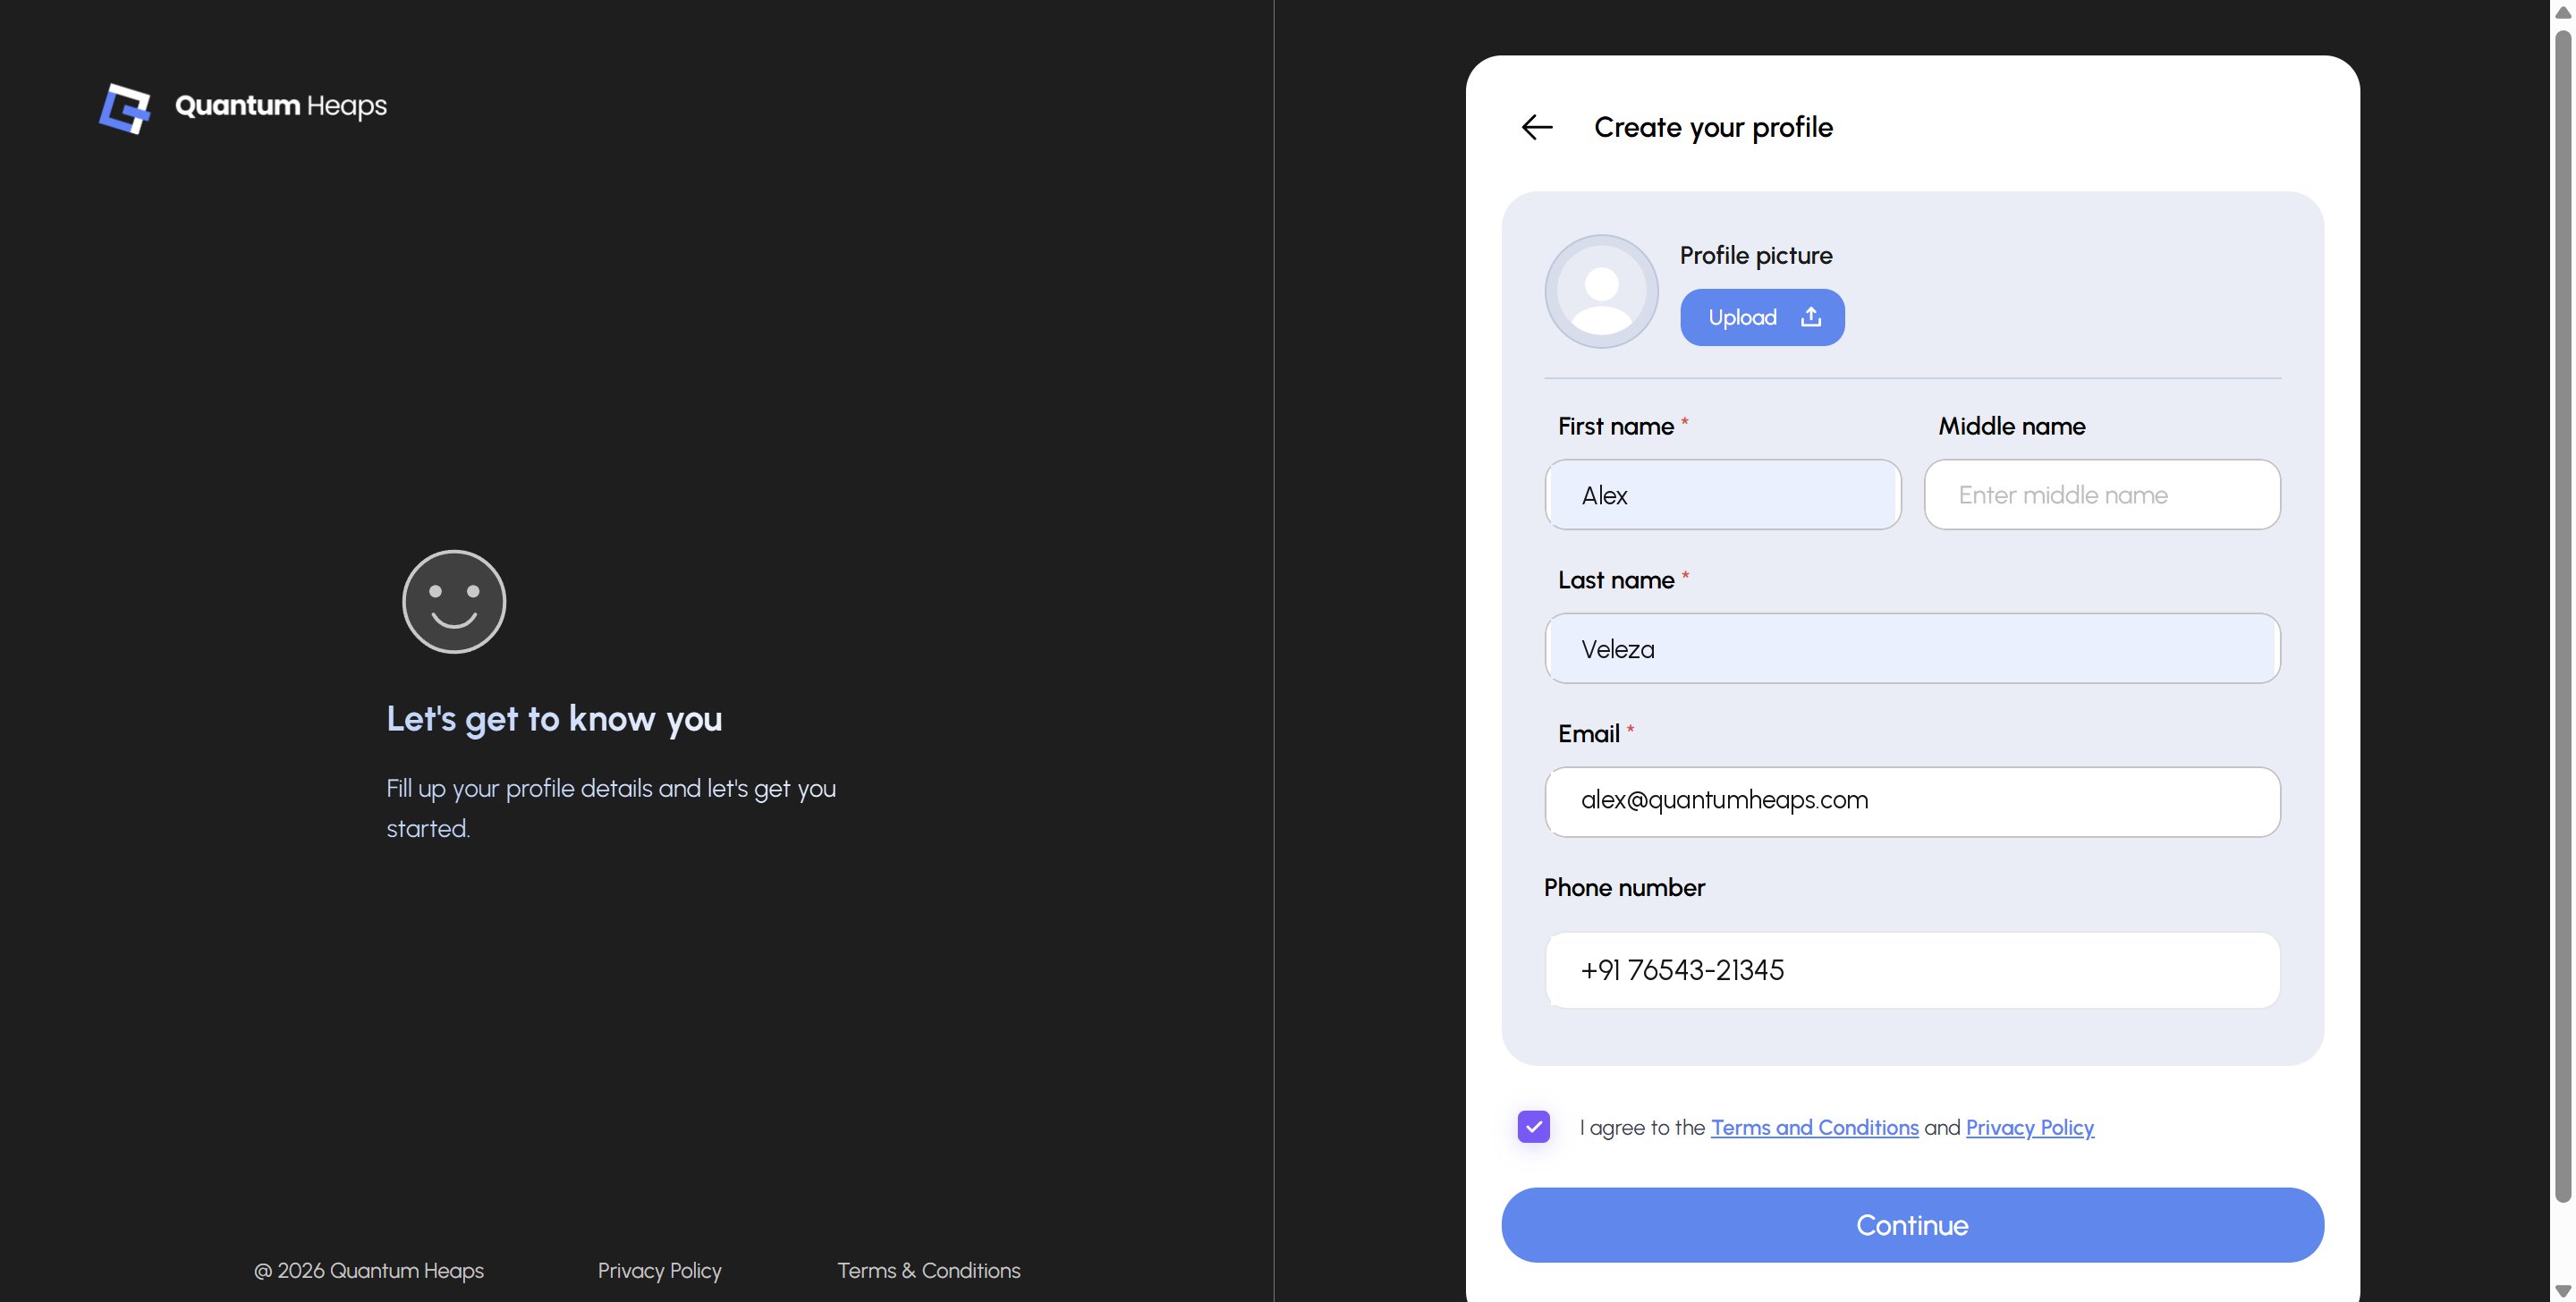
### **Step 2: Create Your Profile**
Fill in your profile details:
* **Profile picture** — optional, upload one if you'd like
* **First name** and **Last name** — required
* **Middle name** — optional
* **Email** — pre-filled from the login step
* **Phone number** — optional, select your country code and enter your number
If you're new to Quantum Heaps, click **Create your profile** to begin sign-up instead.
### **Step 2: Create Your Profile**
Fill in your profile details:
* **Profile picture** — optional, upload one if you'd like
* **First name** and **Last name** — required
* **Middle name** — optional
* **Email** — pre-filled from the login step
* **Phone number** — optional, select your country code and enter your number
 ### **Step 3: Join or Create a Workspace**
Once verified, you'll land on your workspace screen. If your email matches an invitation or a recommended workspace, you'll see it listed here:
* Click **View details** to learn more about the workspace before deciding
* Click **Accept** to join it
* Click **Decline** if it's not the right one
### **Step 3: Join or Create a Workspace**
Once verified, you'll land on your workspace screen. If your email matches an invitation or a recommended workspace, you'll see it listed here:
* Click **View details** to learn more about the workspace before deciding
* Click **Accept** to join it
* Click **Decline** if it's not the right one
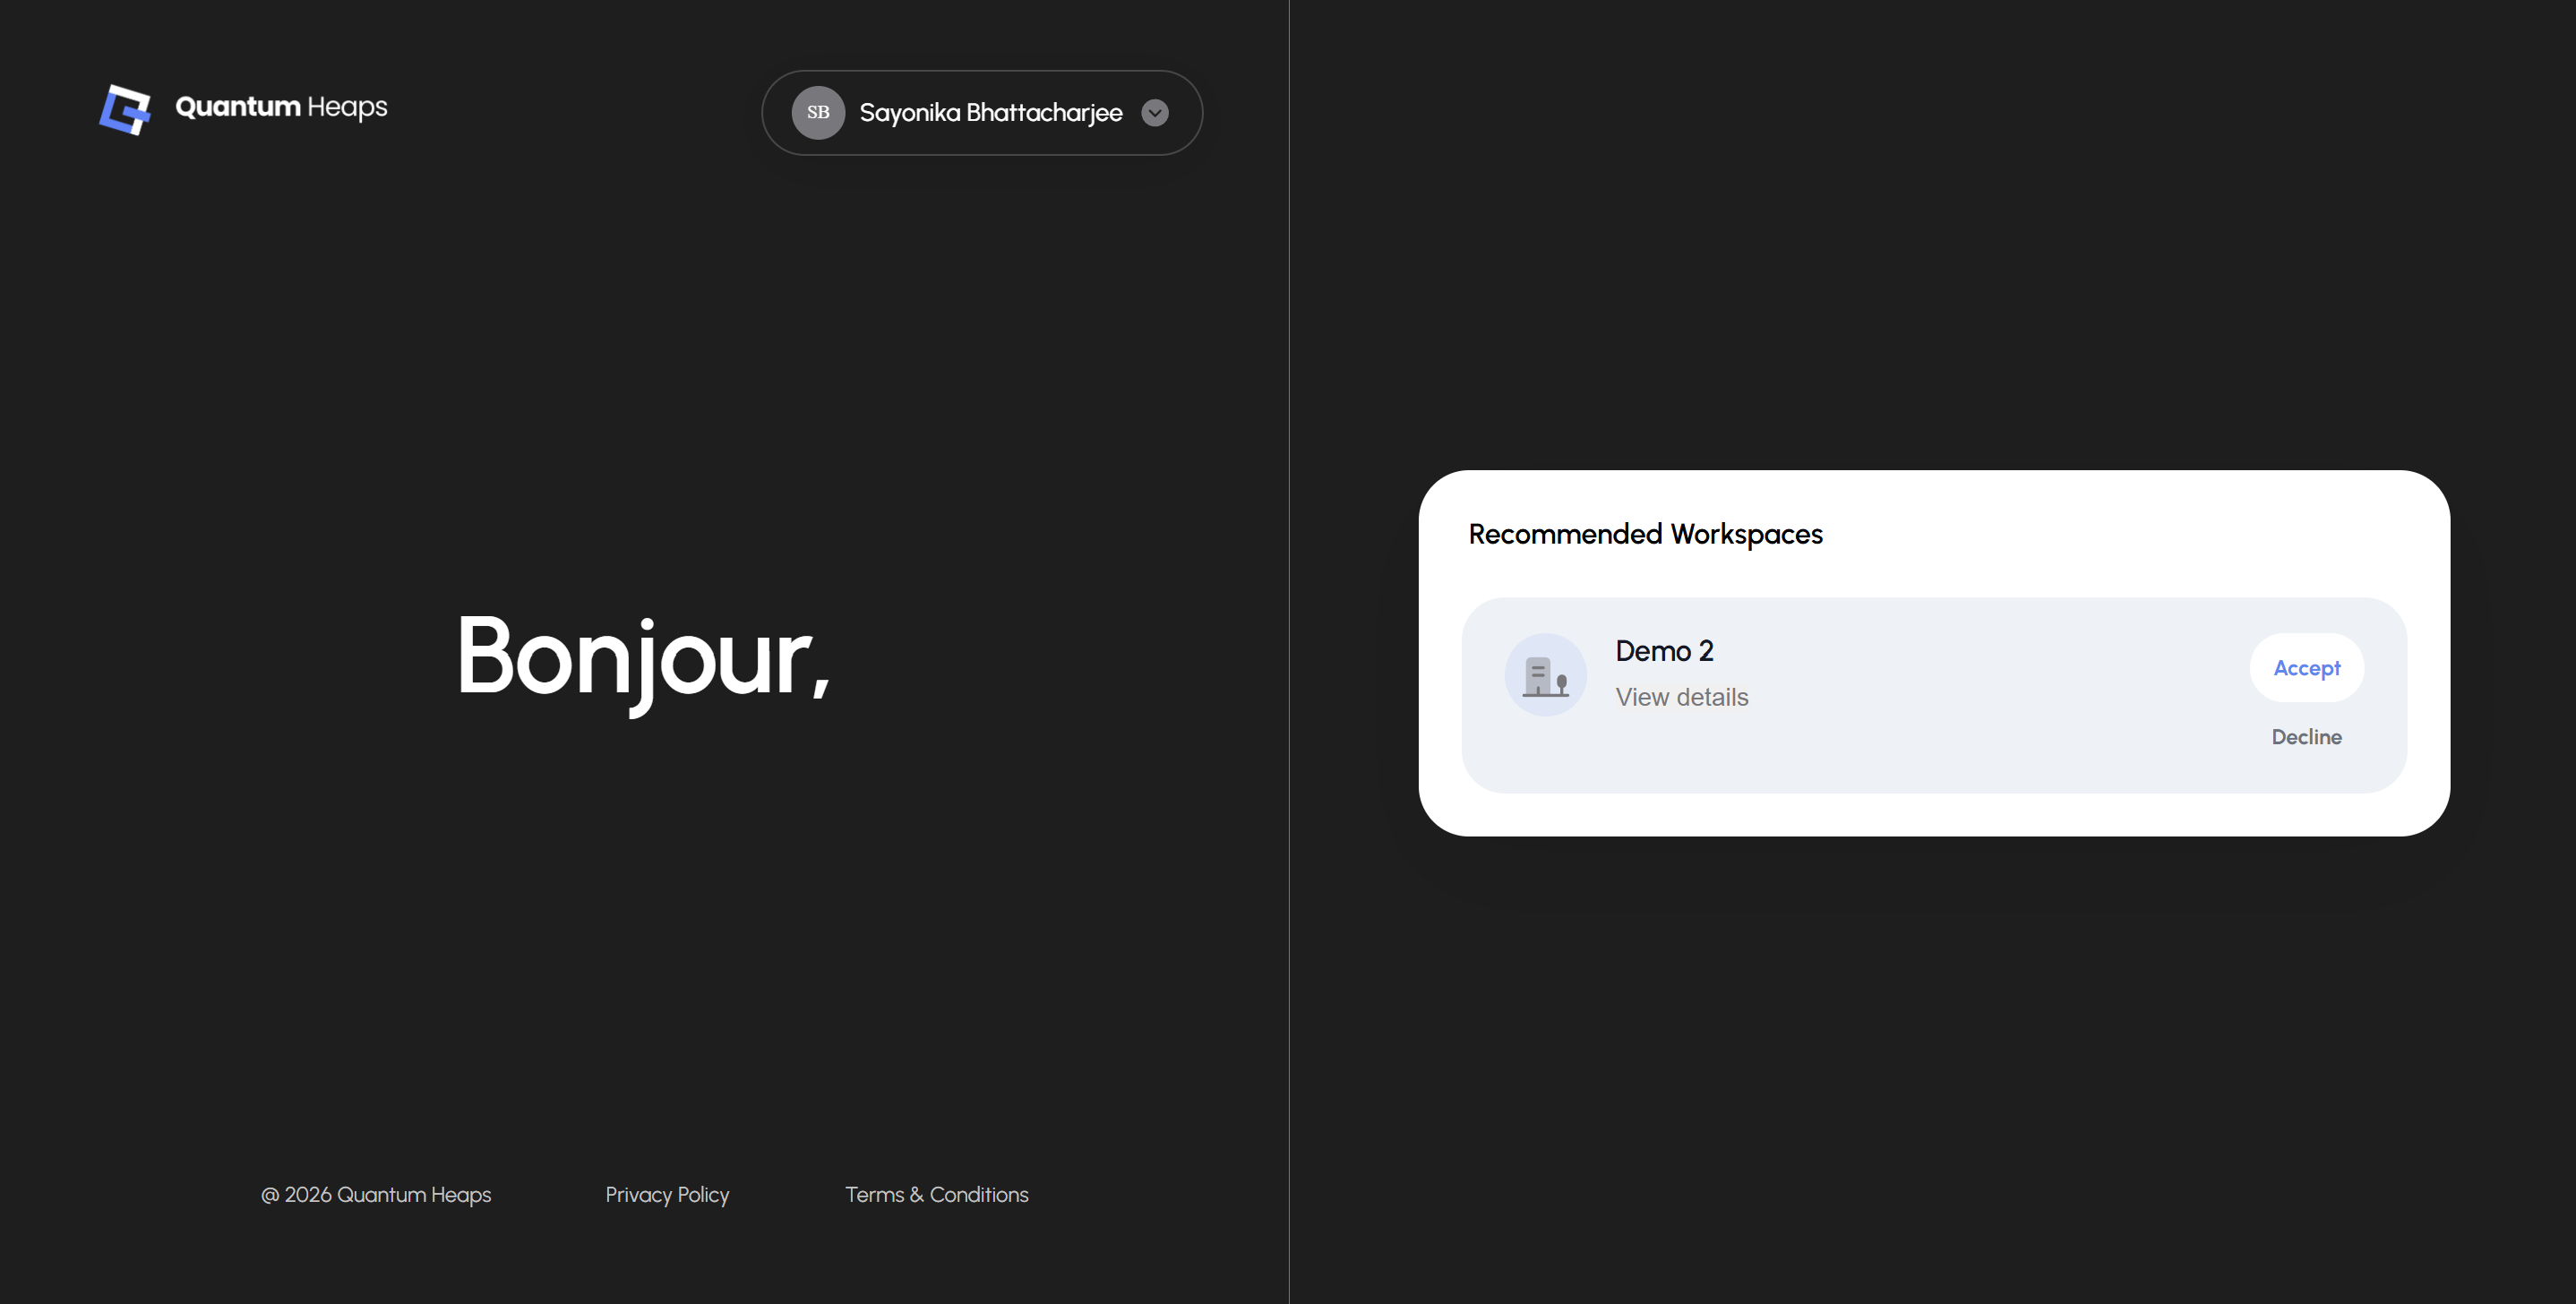 If no workspace is recommended, you'll be guided to create your own from here instead.