> ## Documentation Index
> Fetch the complete documentation index at: https://docs.quantumheaps.com/llms.txt
> Use this file to discover all available pages before exploring further.
# Campaigns
**Understanding Campaign in the Quantum Heaps:**
\*\*Overview:- \*\* The Campaign module in Quantum Heaps helps marketing and sales teams manage outreach in one place. It covers everything from building an Ideal Customer Profile (ICP) to running email campaigns, capturing leads, and enriching lead data — organized across four working areas: Events, Email Sequences, Forms, and Settings (for custom fields, stages, and tags).
**Campaigns help your team:**
* Manage leads — contacts and accounts being targeted for outreach
* Run and track events as part of your go-to-market motion
* Build and send email sequences to nurture prospects
* Create web forms to capture new leads
* Configure custom fields, stages, and tags to fit how your team organizes campaign records
\*\*Step By Step For adding Leads:- \*\*
**How to Add a Lead**
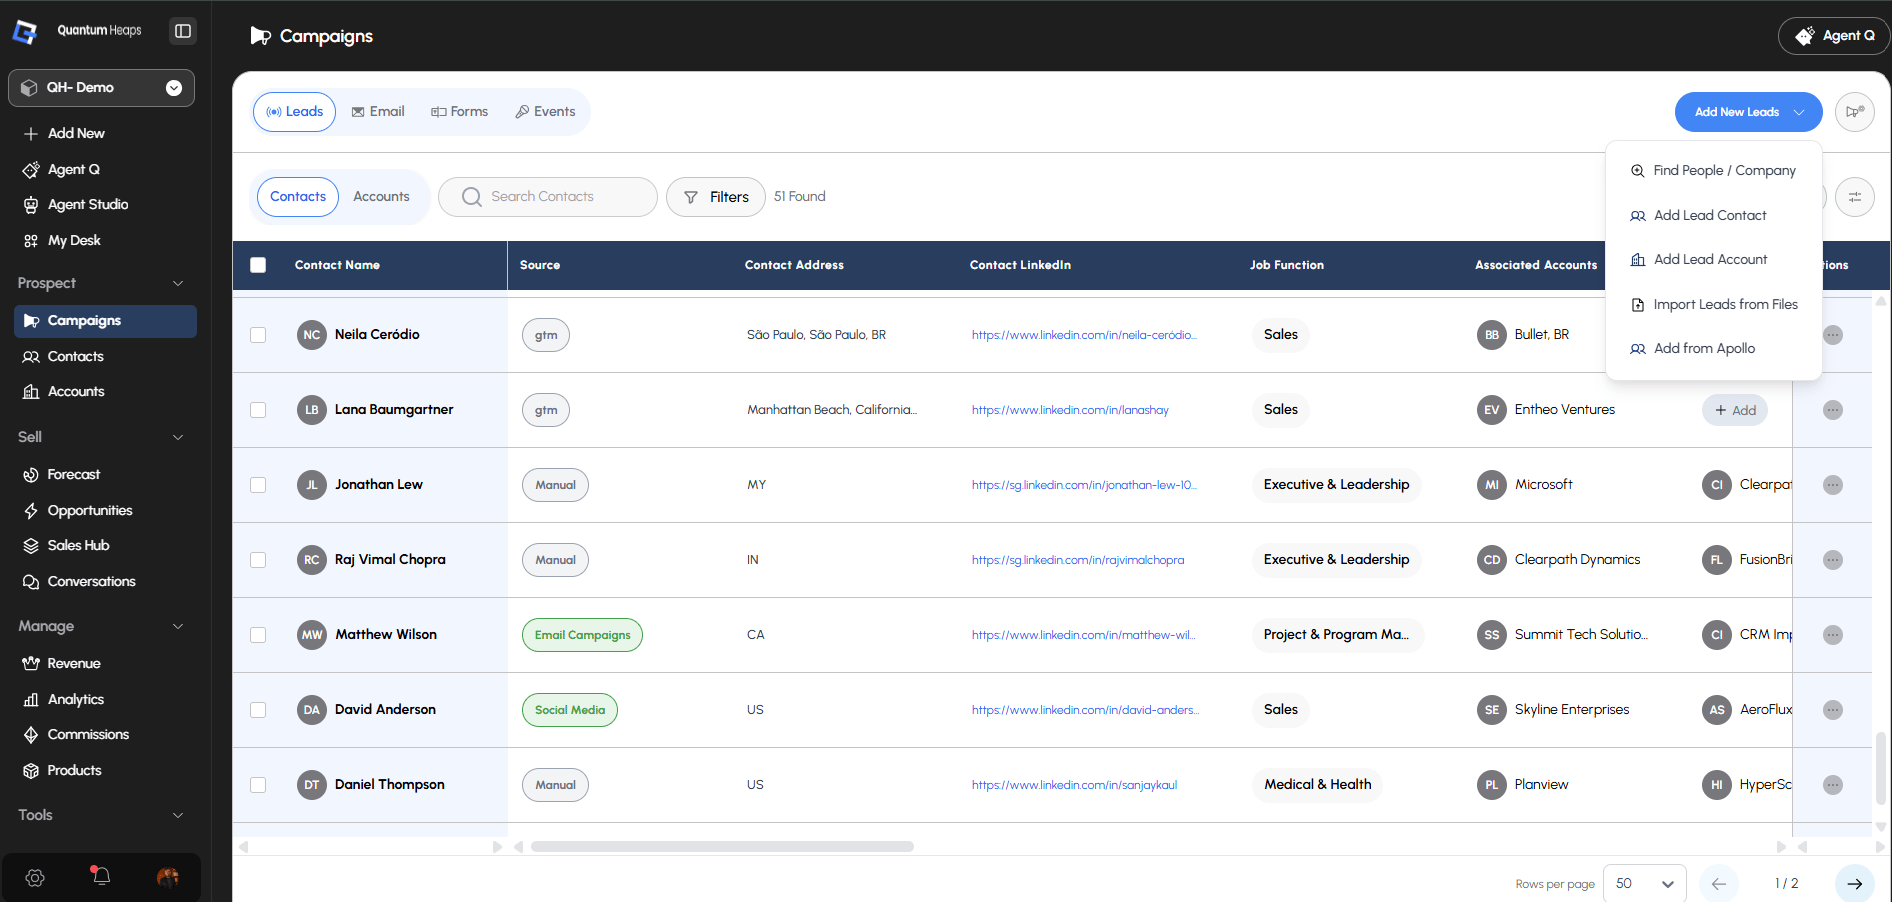
Go to Campaigns and open the Leads section. Click Add New to see four ways to add a lead:
* **Add Contact Manually —** enter contact details yourself
* **Add Contact via GTM —** pull a contact automatically from a connected GTM source
* **Add Account Manually —** enter account details yourself
* **Add Account via GTM —** pull an account automatically from a connected GTM source
* **Import Lead into the System**- To add leads in bulk instead of one at a time, use Import — this lets you import both contacts and accounts directly into the campaign
 **How to Add a Lead via Agent Q**
Prefer not to fill out the form? Ask Agent Q to add the lead for you — just describe who you want to add (e.g., "Add David Velez from Acme Corp as a lead") and it creates the record directly.
**How to Add a Lead via Agent Q**
Prefer not to fill out the form? Ask Agent Q to add the lead for you — just describe who you want to add (e.g., "Add David Velez from Acme Corp as a lead") and it creates the record directly.
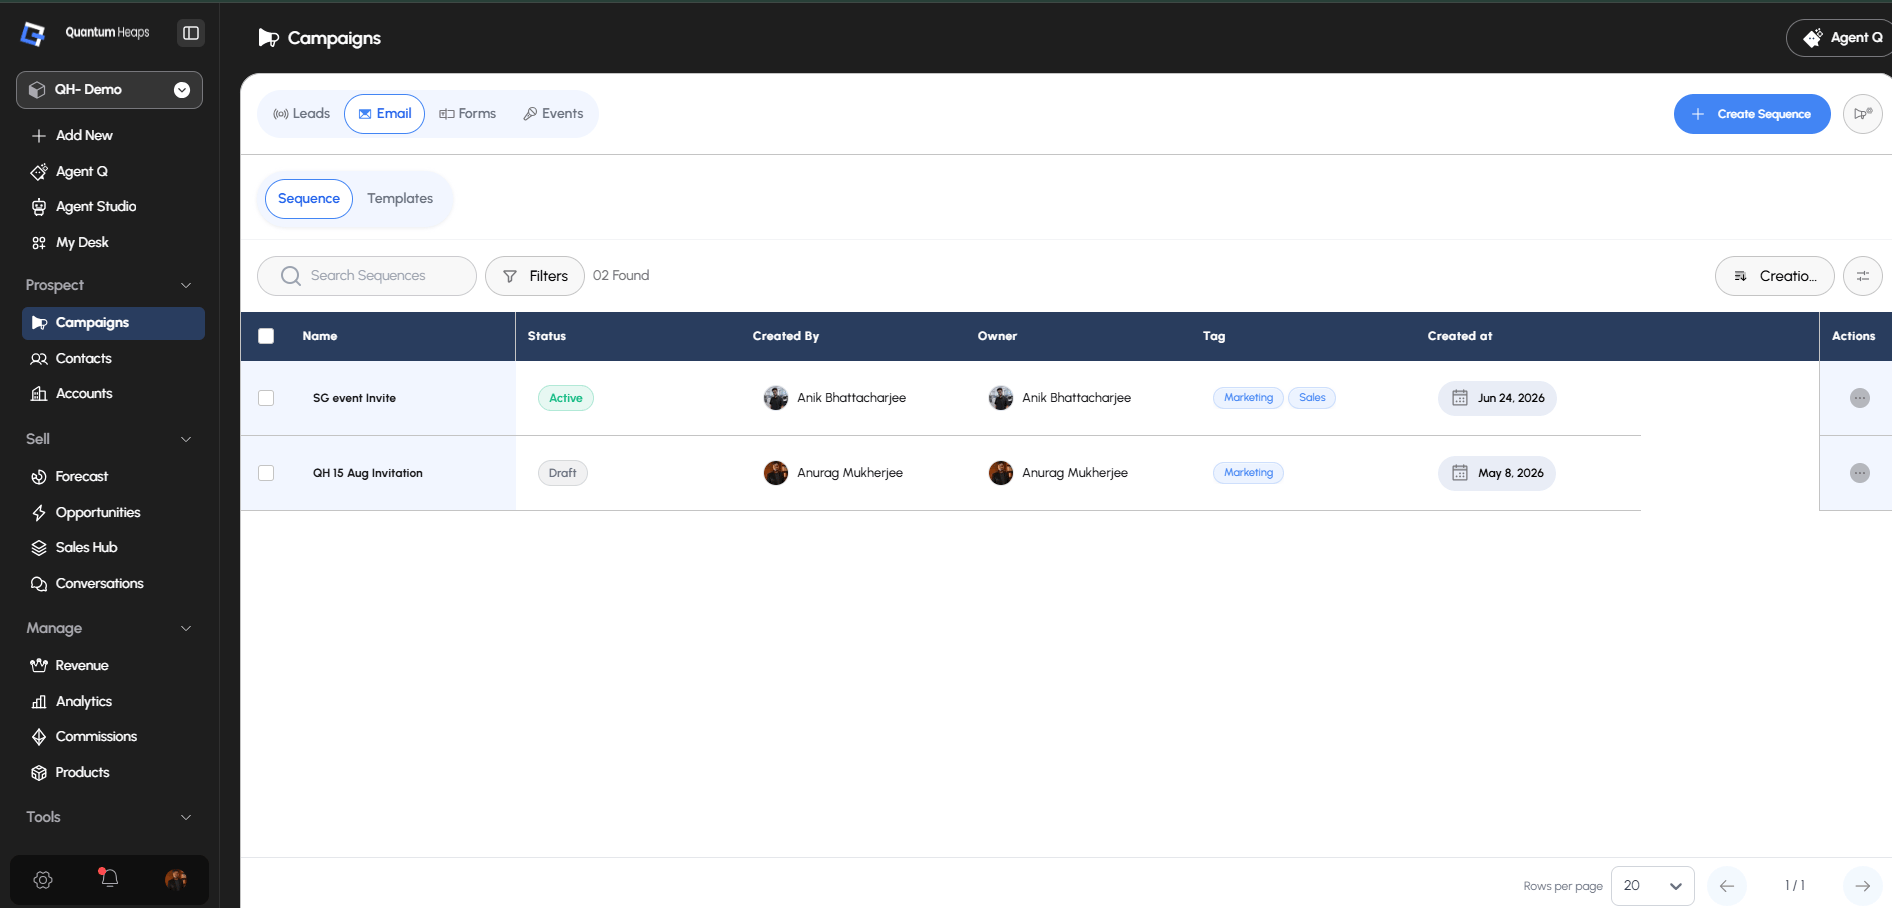
**Email Sequence**:- In Quantum Heaps Email Sequences allow teams to create and manage automated multi-step email outreach flows. The Email Sequences sub-module has two sections: the Sequences list and the Templates library.
 **How to Use -**
* Navigate to Campaign module in Quantum Heaps
* Click on Email
* Select Create Sequence from the top‑right corner
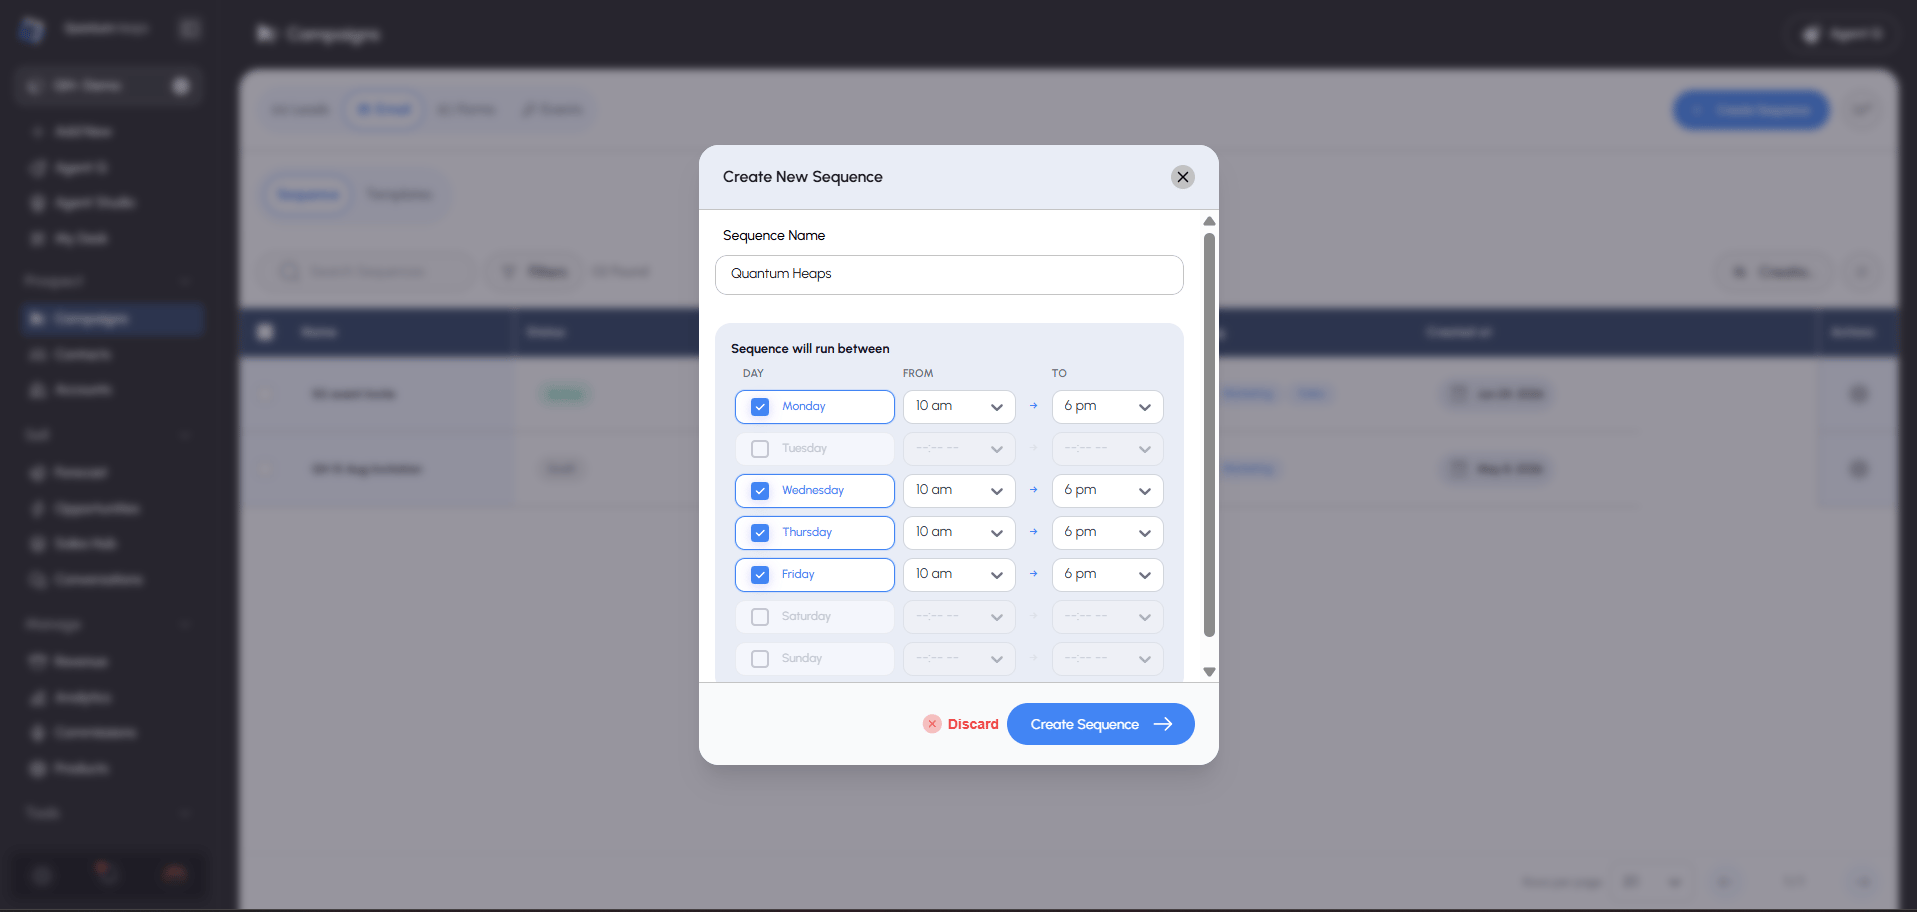
* Enter the Sequence name and specify the time when the sequence should run, then click Create Sequence
* After creation, the Editor tab will open, allowing you to build the sequence
* Add multiple sequence steps and configure rules for when and how the sequence will run
* Save the sequence and active the sequence.
* From the top left of the editor page, click on Contacts
Select Enroll Contacts and choose the contacts you want to run the sequence for.
**How to Use -**
* Navigate to Campaign module in Quantum Heaps
* Click on Email
* Select Create Sequence from the top‑right corner
* Enter the Sequence name and specify the time when the sequence should run, then click Create Sequence
* After creation, the Editor tab will open, allowing you to build the sequence
* Add multiple sequence steps and configure rules for when and how the sequence will run
* Save the sequence and active the sequence.
* From the top left of the editor page, click on Contacts
Select Enroll Contacts and choose the contacts you want to run the sequence for.
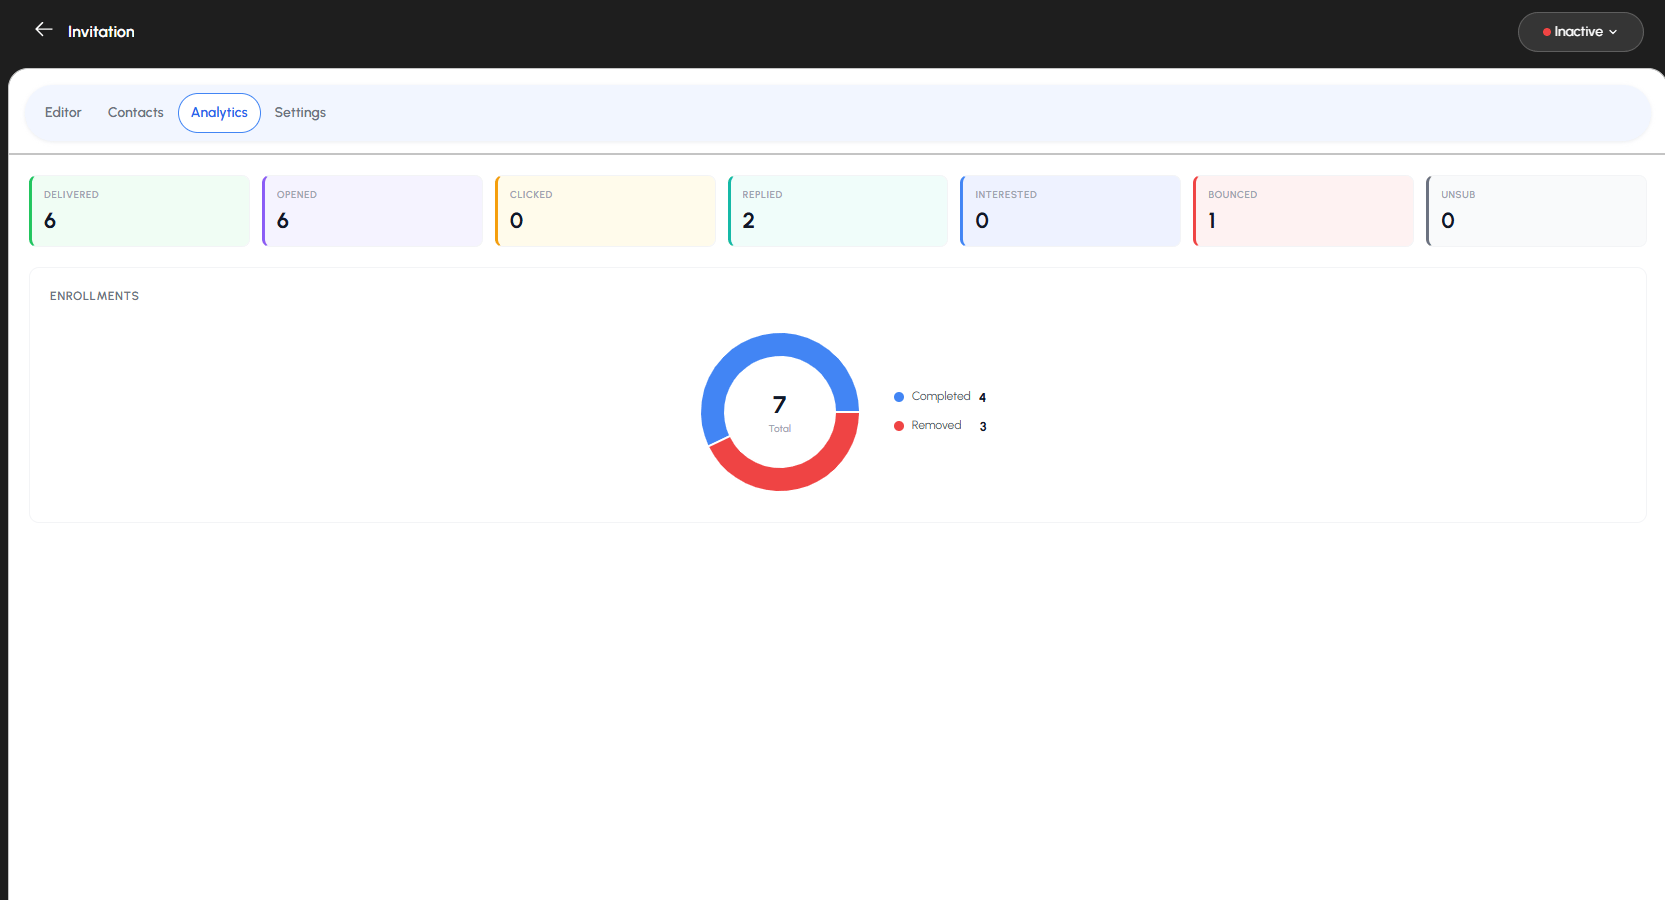
Access the **Analytics** section to monitor sequence performance
**View detailed metrics including**:
* Emails **Delivered**
* Emails **Opened**
* Links **Clicked**
* Responses **Received**
* Prospects marked as **Interested**
* Emails **Bounced**
* Contacts who **Unsubscribed**